A check-in flow sets the steps a visitor takes at the FrontDesk kiosk, from the moment they start a check-in at the kiosk to the end: consent, the photo, how the visitor is identified, the ID document, the questions, a temperature reading, approval, and branches that choose between them. One system can send contractors through an NDA and a location manager’s approval while delivery drivers give their name and company and go. Without a flow, kiosks follow the Kiosk settings pages as before.
Before you start:
- Your role can view and save system settings.
- The fields, custom questions and agreements a flow asks already exist. A flow chooses from them; it does not create new ones (the Contractor with NDA template is the one exception, see below).
- Check-out and onboarding are not part of a flow. They keep their fixed steps.
Open Check-in flows
Go to Visitors > Settings > Kiosk and click Check-in flows in the kiosk menu.
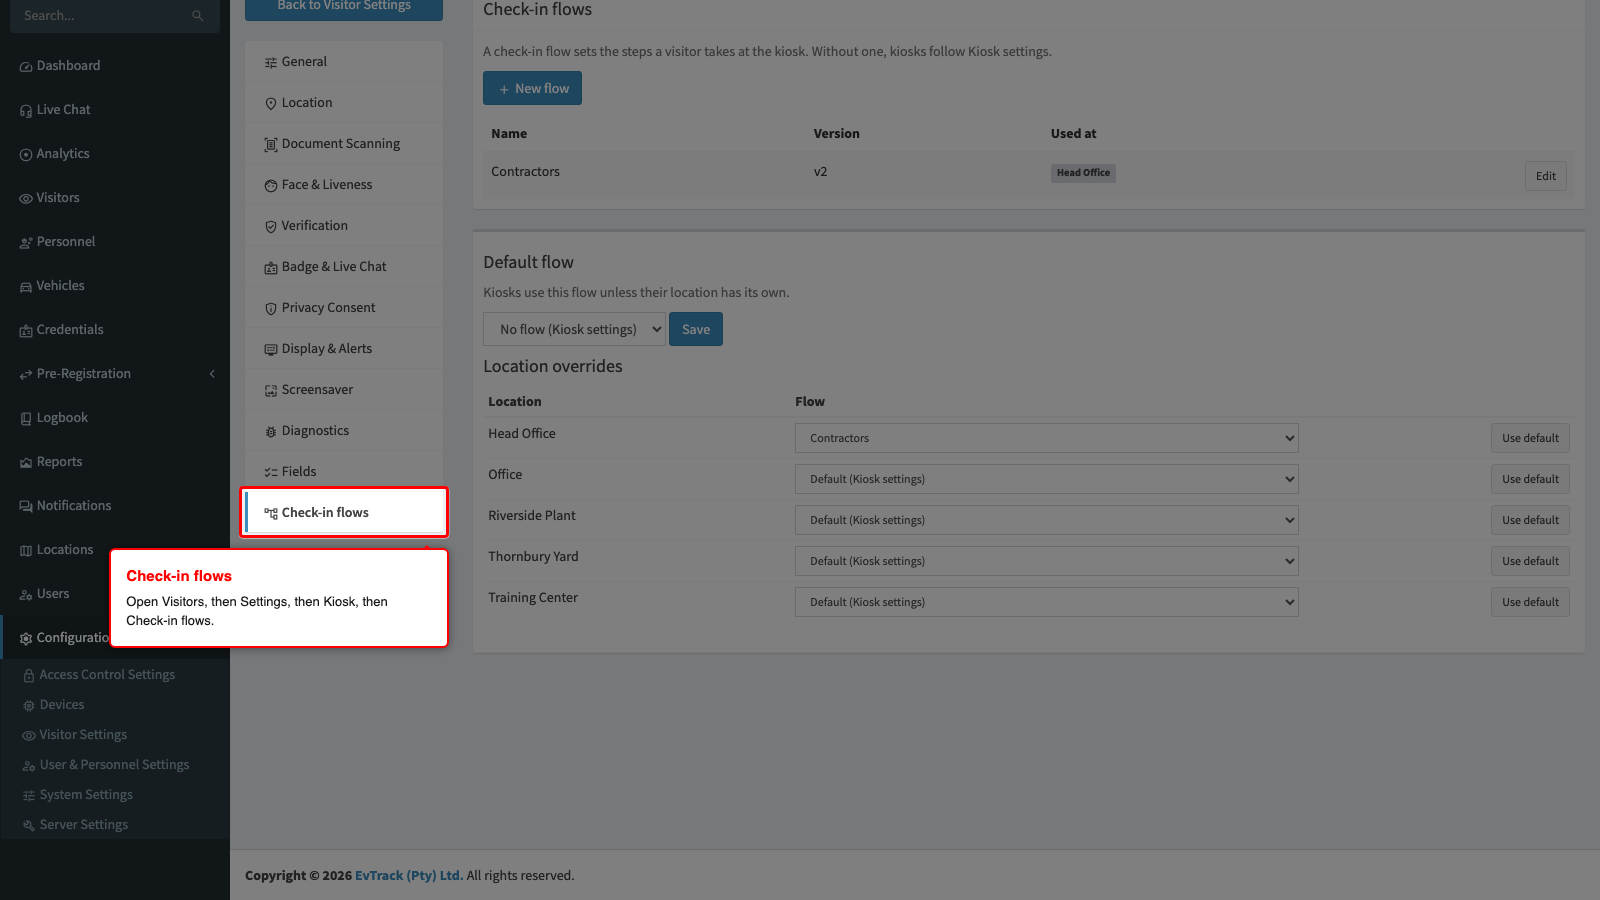
Create a flow
Click New flow, type a name and choose where to start:
| Start from | What you get |
|---|---|
| A blank flow | A start and an end only. |
| Your current kiosk settings | Today’s kiosk steps as a flow, ready to change. Nothing changes on the kiosks until you publish and assign it. |
| Visitor with host approval | Invited visitors check in; walk-ins wait for their host to approve. Published as version 1. |
| Contractor with NDA | Contractors at the Office location sign an NDA and wait for the location manager; everyone else names a host. Published as version 1. It reuses an agreement named NDA and a location named Office, and creates them when they do not exist (your role then needs the right to add agreements and locations). |
| Delivery | Consent, then name and company, with no photo or approval. Published as version 1. |
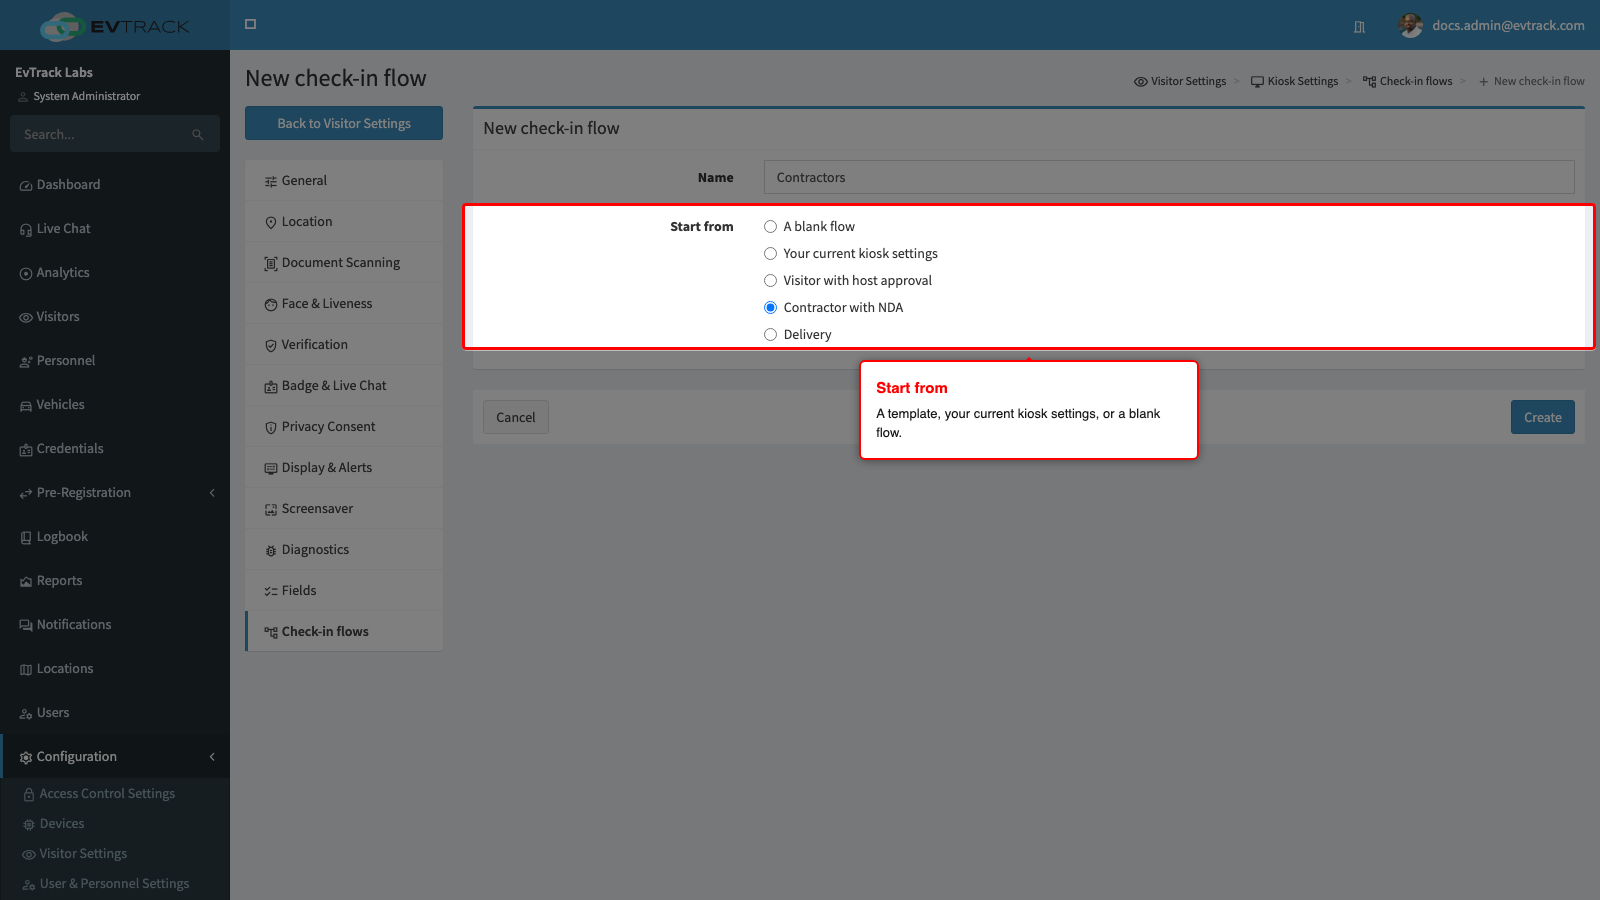
Click Create. The flow opens in the editor.
The editor
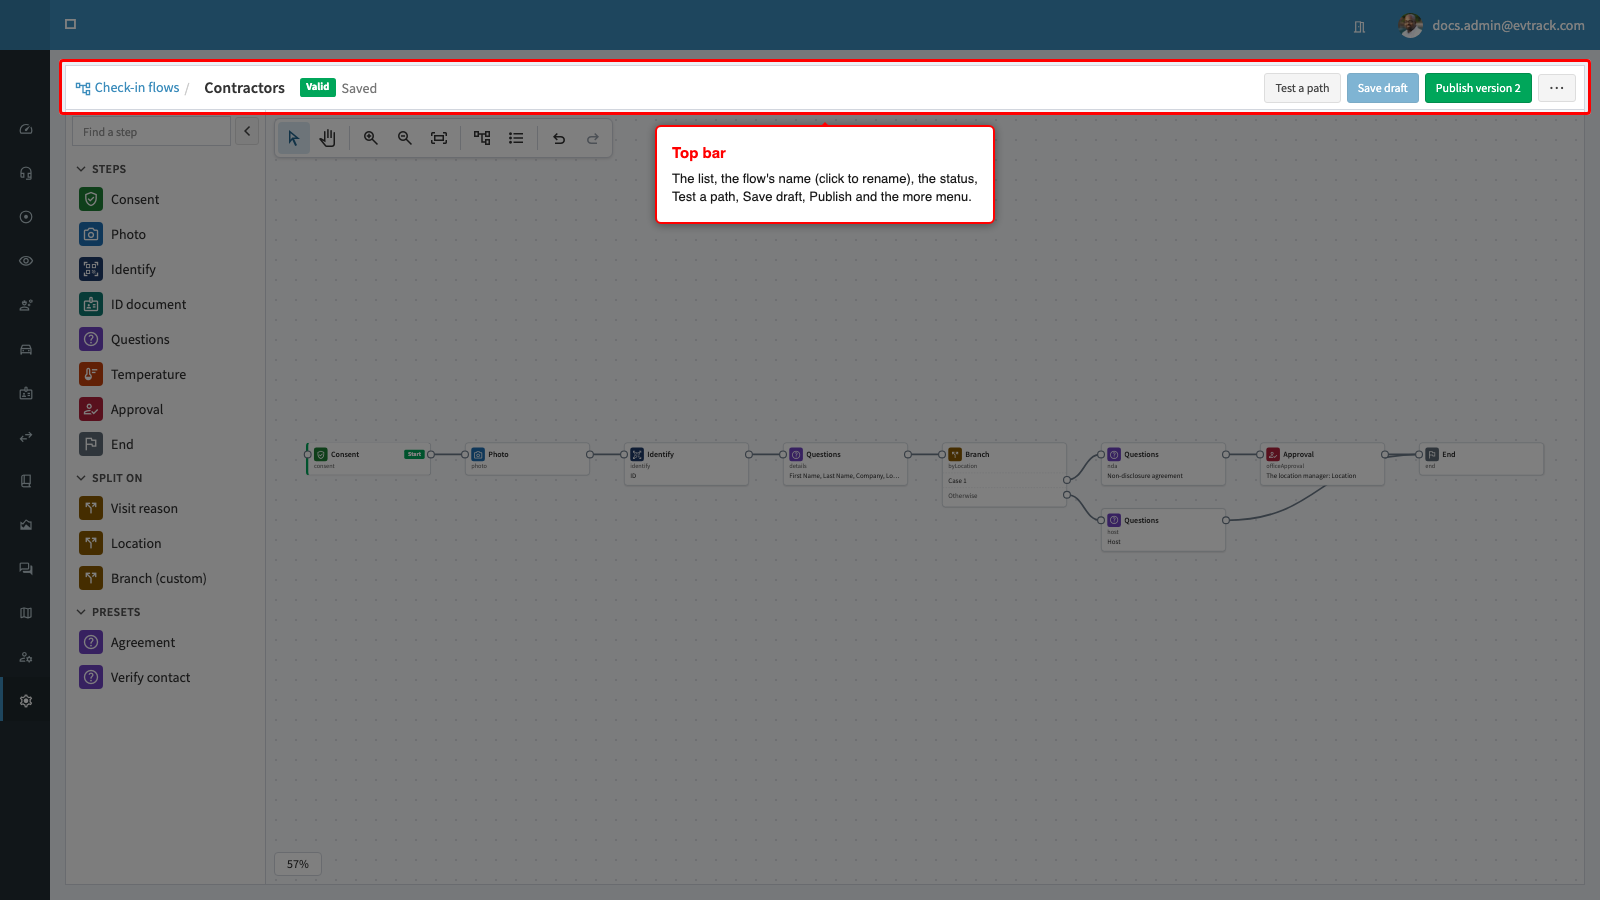
The editor fills the page. The app menu starts collapsed to icons (its toggle opens it again for this visit), and the page has no title row: everything sits in one bar at the top and the canvas below it.
The top bar. Check-in flows takes you back to the list. The flow’s name is a button: click it, type the new name and press Enter or click away to save it (Esc cancels). The status beside it checks the flow as you edit, and the bar shows when you have unsaved changes. At the end are Test a path, Save draft, Publish version n and ⋯, a menu with History, Assign to locations (the list page, where flows are assigned), Back to check-in flows and Delete flow. A flow in use cannot be deleted: the editor shows why. If you leave with unsaved changes, the editor asks first.
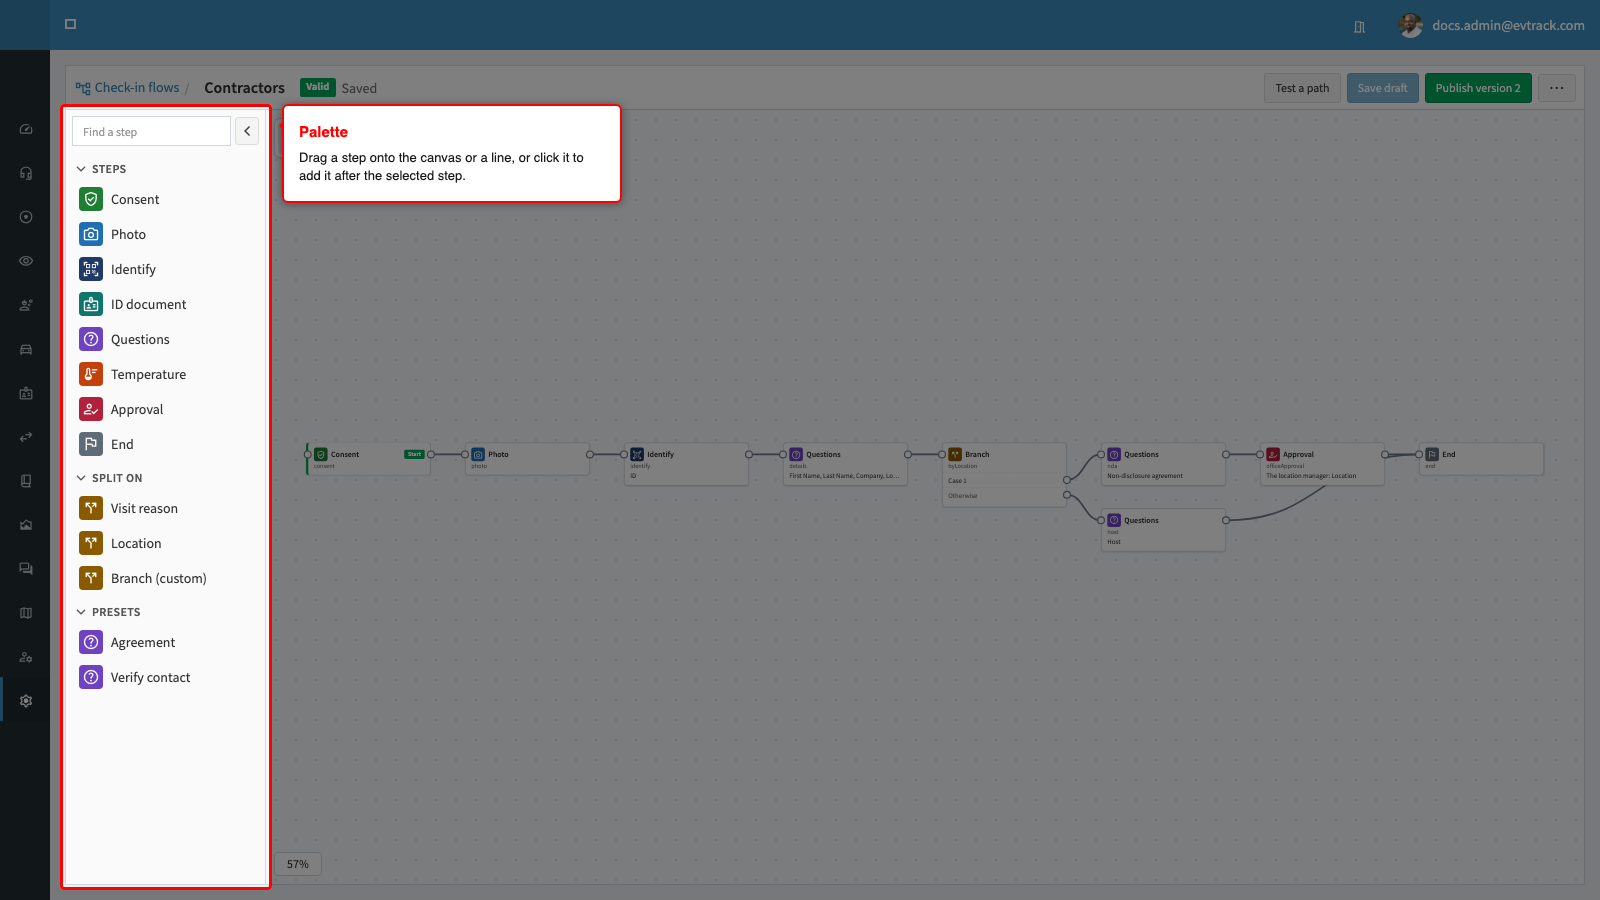
The palette. The panel on the left holds the steps you can add, in three groups: Steps (consent, photo, identify, ID document, questions, temperature, approval, end), Split on (visit reason, location, and a custom Branch) and Presets (an agreement, and verifying an email or mobile number). Find a step filters them. Add a step by dragging it onto the canvas, by dropping it on a line between two steps (it is inserted between them), or by clicking it (it is added after the selected step and joined to it; with no step selected, in the middle of the view). Hide the palette, at its top, folds it into a strip of icons; clicking an icon still adds the step.
The canvas. Each step is a card with its type, its name and a one-line summary of its settings; the step the flow starts with carries a Start badge, and a branch lists its outputs, each beside the line that leaves it. The tools at the top left are:
- Select (the default): click a step to select it, Shift-click to add or remove one, and drag across empty canvas to select every step the box touches. Dragging a selected step moves the whole selection.
- Pan: drag the empty canvas to move around. With either tool, hold Space and drag, or scroll with two fingers or the mouse wheel.
- Zoom in, Zoom out and Fit to screen. Pinch, or hold Ctrl (⌘ on a Mac) and scroll, to zoom at the pointer. The zoom level shows at the bottom left; click it to go back to 100 %. The flow opens fitted to the screen, at no less than 75 %.
- Tidy up lays the steps out in columns from the start, in order.
-
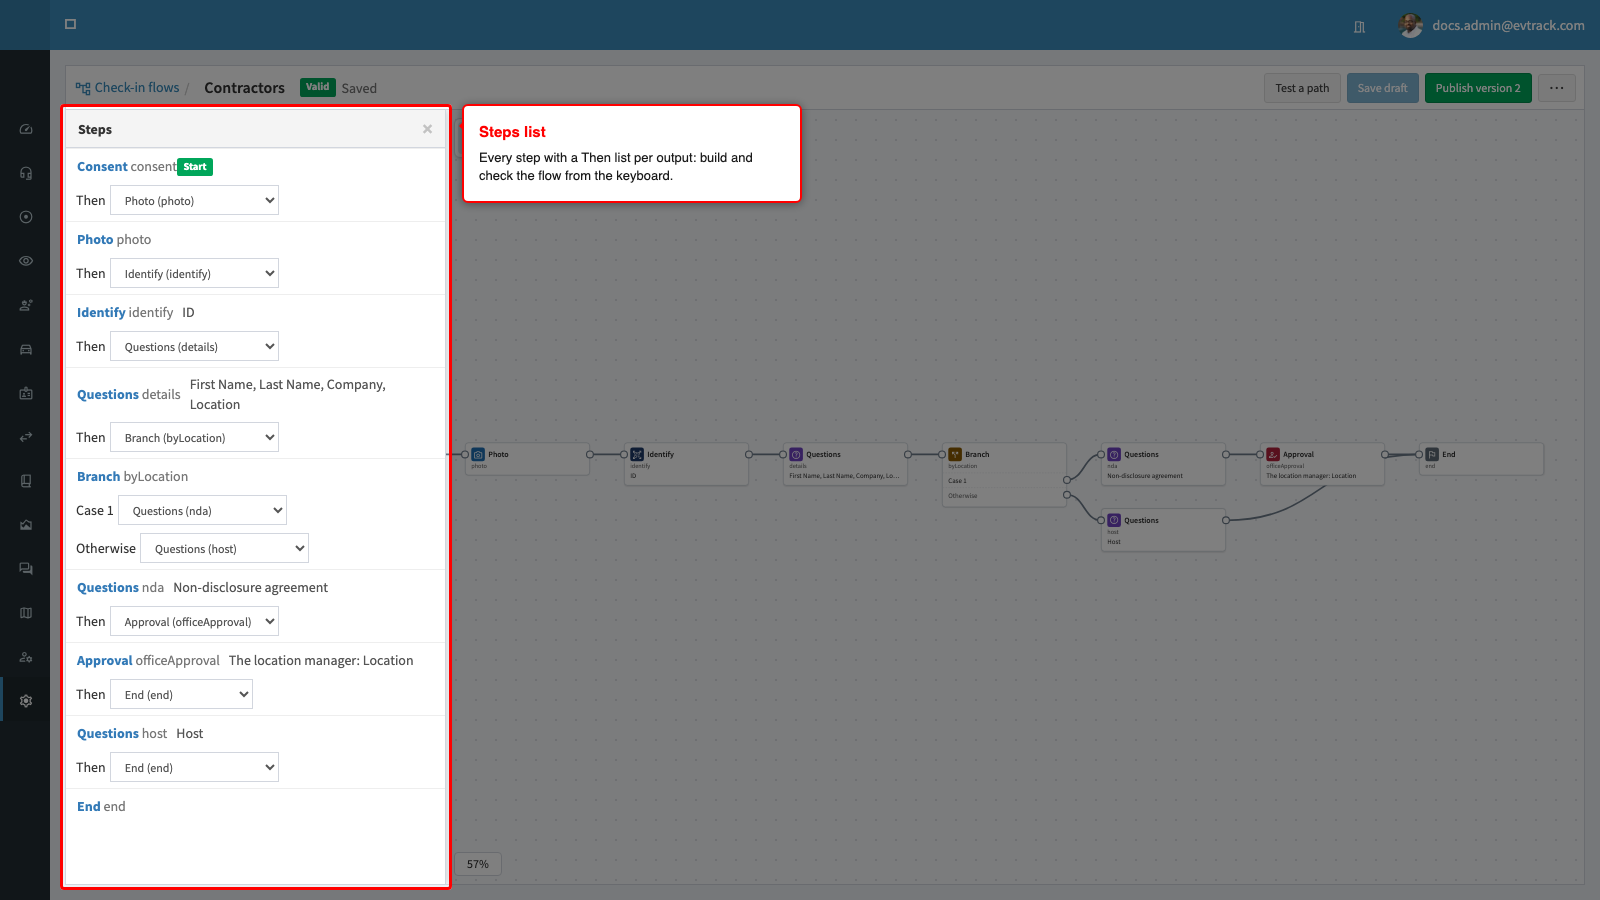
Steps list opens a list of the steps over the palette, for the keyboard: each step with a Then list per output to choose where it leads. Choosing a step there selects it and brings it into view.
- Undo and Redo step through your changes, up to 50. They also work with Ctrl+Z and Ctrl+Shift+Z (⌘Z and ⌘⇧Z on a Mac).
With the canvas or the tools in focus, Delete removes the selected steps (it asks first unless they have no settings of their own), Esc clears the selection, Ctrl+D (⌘D) duplicates it, and Ctrl+C / Ctrl+V (⌘C / ⌘V) copy and paste it. A copy keeps the steps’ settings and the lines between them; the copies get new names, land beside the originals (or at the pointer when you paste over the canvas), and are never the start. The copy lasts only while the page is open.
To join two steps on the canvas, drag from a step’s output dot (on its right edge) to the next step.
Properties. Selecting one step opens its settings on the right. With several steps selected, the panel offers Duplicate and Delete steps instead. Click empty canvas or press Esc to close it. Drag its left edge to make it wider or narrower; the editor remembers the width in this browser. History and Test a path open in the same place.
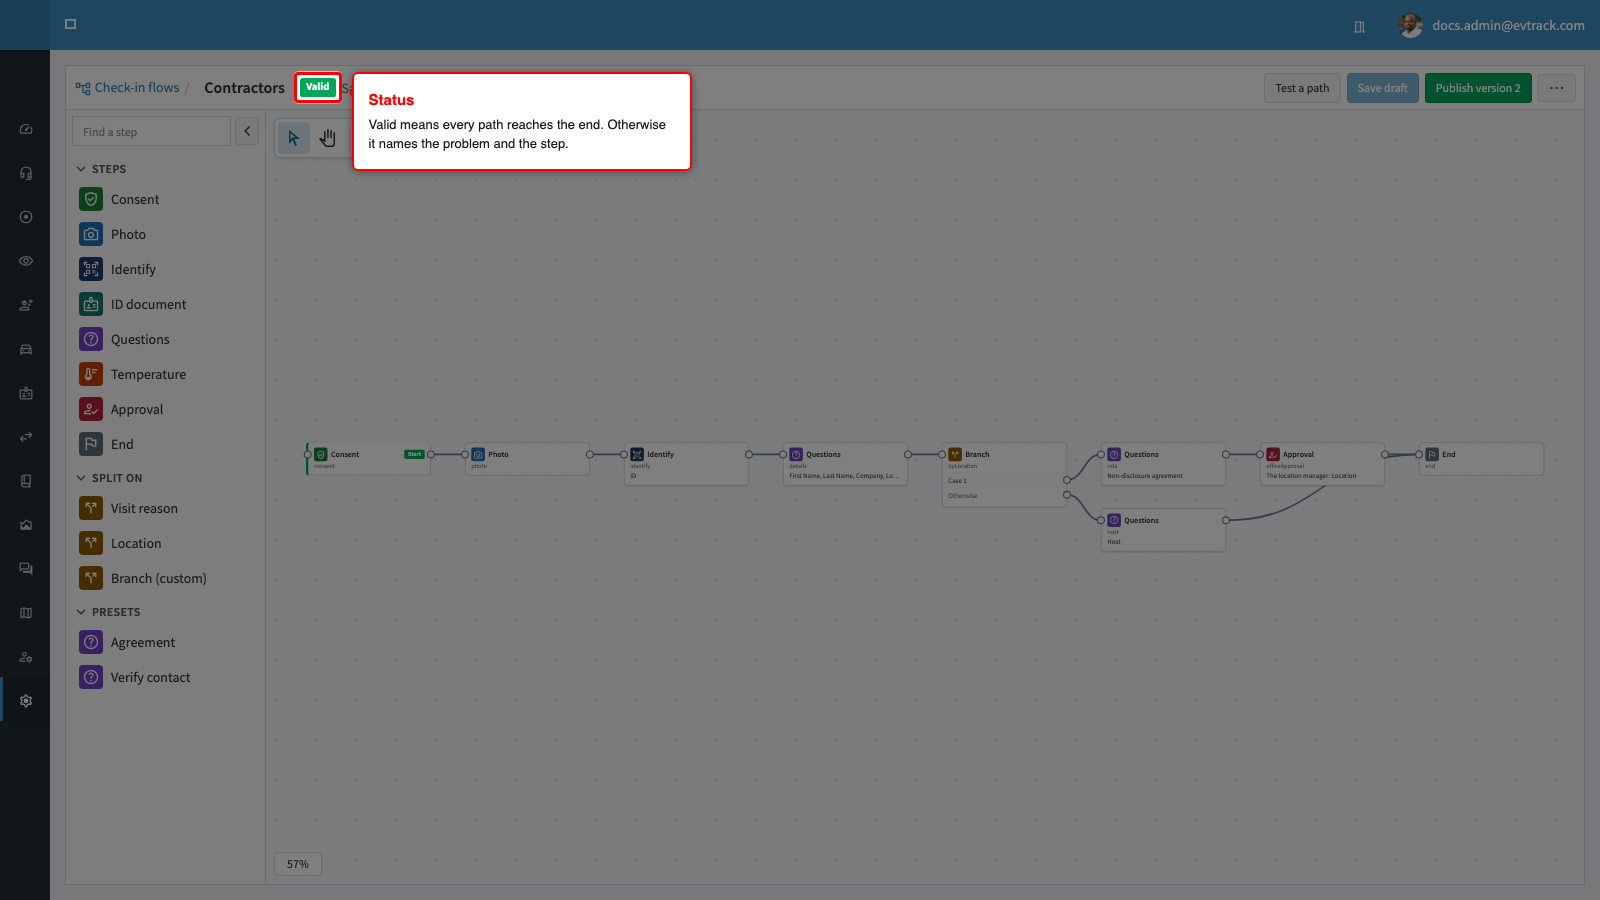
The status checks the flow as you edit. Valid means every path reaches the end. Otherwise it names the problem and the step, for example “A step leads nowhere. Connect every output to a step.”; click the step’s name to select it.
Keep these rules in mind:
- Every output must lead to a step, and every path must reach End without going round in a circle.
- Take the photo before scanning an ID document.
- A path may have each kind of step (consent, photo, identify, ID document, temperature, approval) only once.
- A branch can test a question only when every path to it asks that question first.
- Only an email or mobile number question can be verified.
- Step names are shown in logs. Do not put names of people or places in them.
Branches
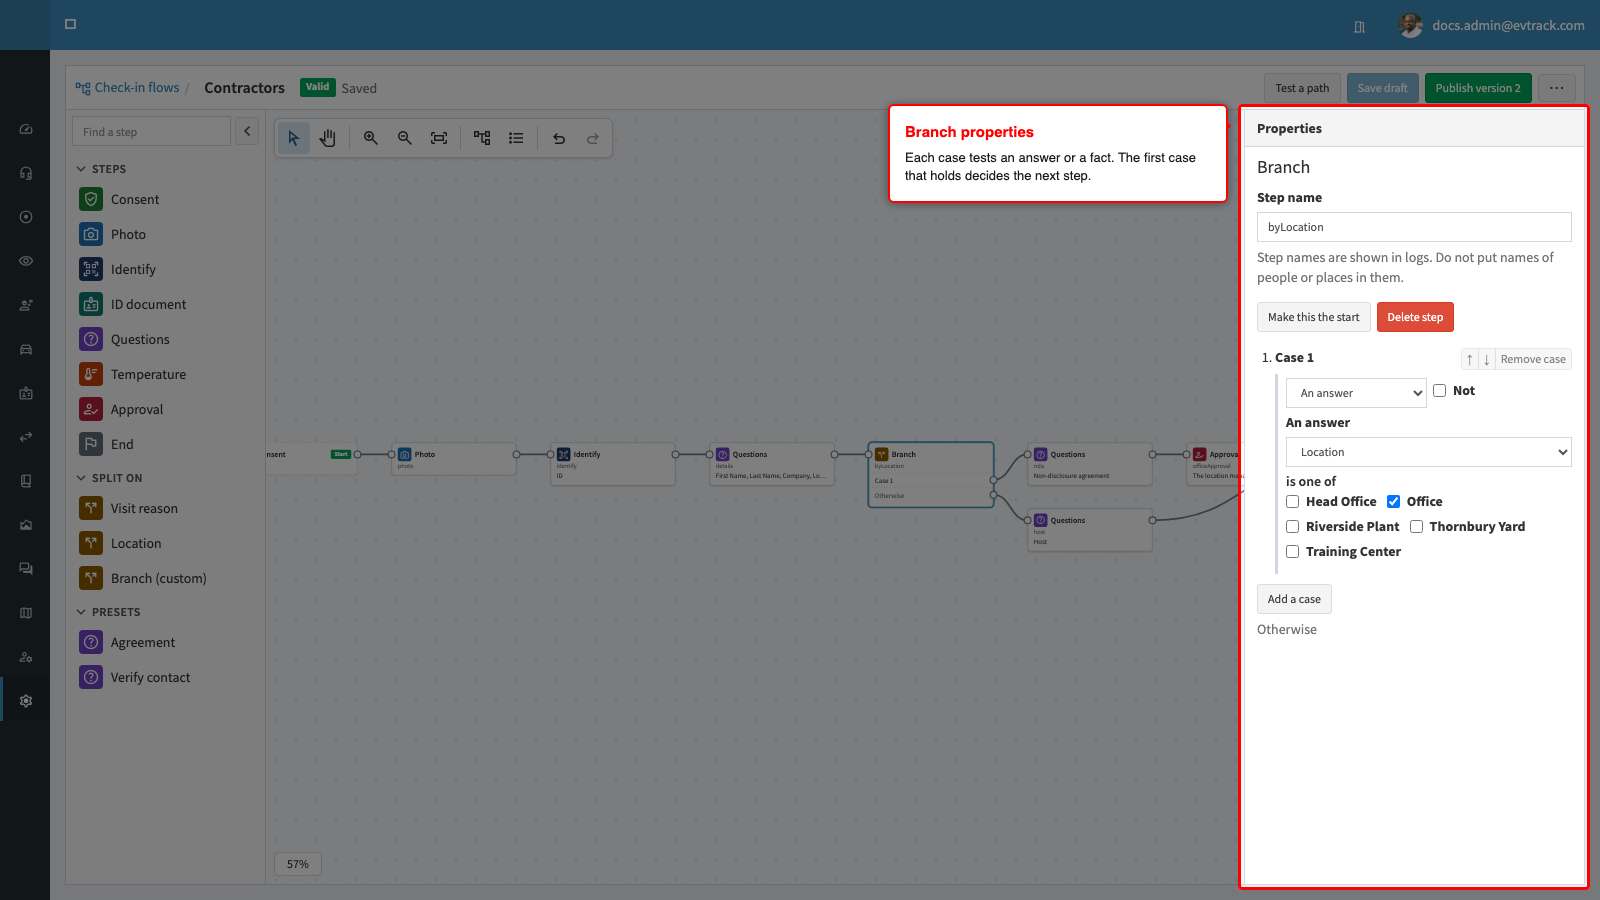
A Branch step chooses the next step. Each case tests an answer (for example, the location the visitor picked) or a fact about the visit: how the visitor identified themselves, whether they were invited, the ID document’s type, country and expiry, the day and time at the kiosk, or which kiosk it is. The first case that holds decides; Otherwise catches the rest. A case can combine tests with all of, any of and not.
Split on visit reason or location
Two palette items under Split on, Visit reason and Location, build a question and a split in one drop. The flow asks the question, then a Branch has one case for each visit reason (or location) in your system, named after it, and an Otherwise. When a step followed the place where you dropped it, every case and Otherwise connect to that step; connect or change each one where you want it to go. Location splits on the location the visitor picks, not on the kiosk’s own location; to give one location’s kiosks their own flow, use a location override (below).
With more than 20 values, or none yet, the drop adds the question only and says why. Use a plain Branch and choose the values it should split on.
The new branch follows the database. Add, rename or delete visit reasons or locations after you publish, and kiosks pick the change up at their next refresh (within about 5 minutes) without a new version:
- A deleted value drops out of its case. A case left with no values never matches.
- A new value goes to the case chosen under New values go to, or to Otherwise when that is left at Otherwise.
Deleting a visit reason no longer stops the flow being served. A visitor who picks a value in the few minutes after it was deleted is asked to see reception.
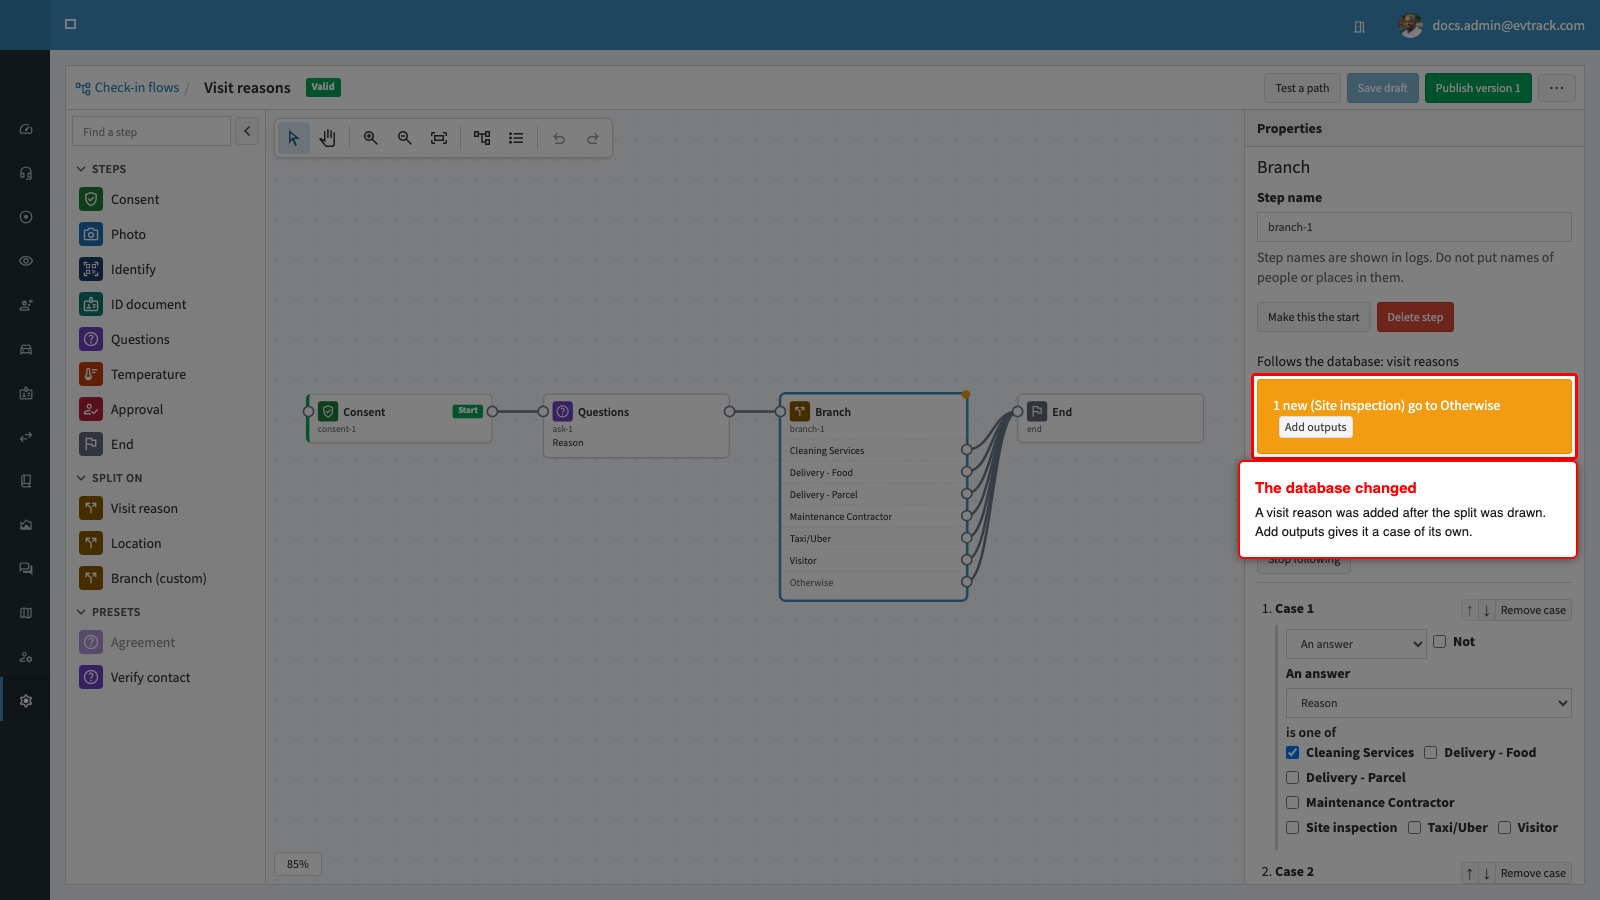
Select a branch on the canvas and its Properties panel shows, when it is out of date with the database, a banner such as “2 new (Interview, Audit) go to Otherwise” and “1 removed”. Add outputs gives each new value a case of its own, while the branch remains within 20 cases. Save draft removes deleted values from the branch. If every value of the split was deleted, the branch keeps its outputs and keeps following the database, and the banner says so. For a visit reason split, publishing is refused until you add outputs or delete the split. A location split can still be published: visitors go to Otherwise. Stop following turns the branch into an ordinary one. Changing a case so it no longer tests that field does the same.
Approval
An Approval step makes the visitor wait. Choose who approves:
- The host: the host the visitor named, or the invited visitor’s own host.
- The location manager: the managers of the location the visitor picked (or of the kiosk’s location). Any one of them decides, through the approve or decline link sent by email, and by SMS when they have a mobile number. Location managers do not get a push notification in the mobile app. When the location has no manager who can receive it, the request goes to the people who receive registration notices when nobody else can.
On a kiosk with a flow, the Approval step decides who approves first, whatever Require Host Approval says on the Host Approval page. The location’s own approvals then follow on every path, with or without an Approval step: location manager approval where the location requires it, then compliance review where it is on. A path whose approval step already asked the location managers does not ask them again. The location is the one the visitor picked, else the kiosk’s.
Invited visitors with a valid QR code, PIN or ID follow Pre-booked visitors and approval on the Host Approval page: let them through without approval, ask only the flow’s approval step, or ask every approval. To treat invited visitors differently in the flow itself, branch on whether the visitor was invited.
Temperature
A Temperature step takes a reading and checks it against the step’s own lowest and highest allowed values. On a kiosk with a flow, only a path with a temperature step screens the visitor.
Save, publish and history
Save draft keeps your changes without changing any kiosk. Publish version n is available only while the flow is valid; it makes the draft the version kiosks use. If someone else saved the flow after you opened it, you can reload their version or overwrite it.
History lists every published version with who published it and when. Compare with the draft shows the steps added, removed or changed; Restore as draft copies an older version into the draft for you to publish again.
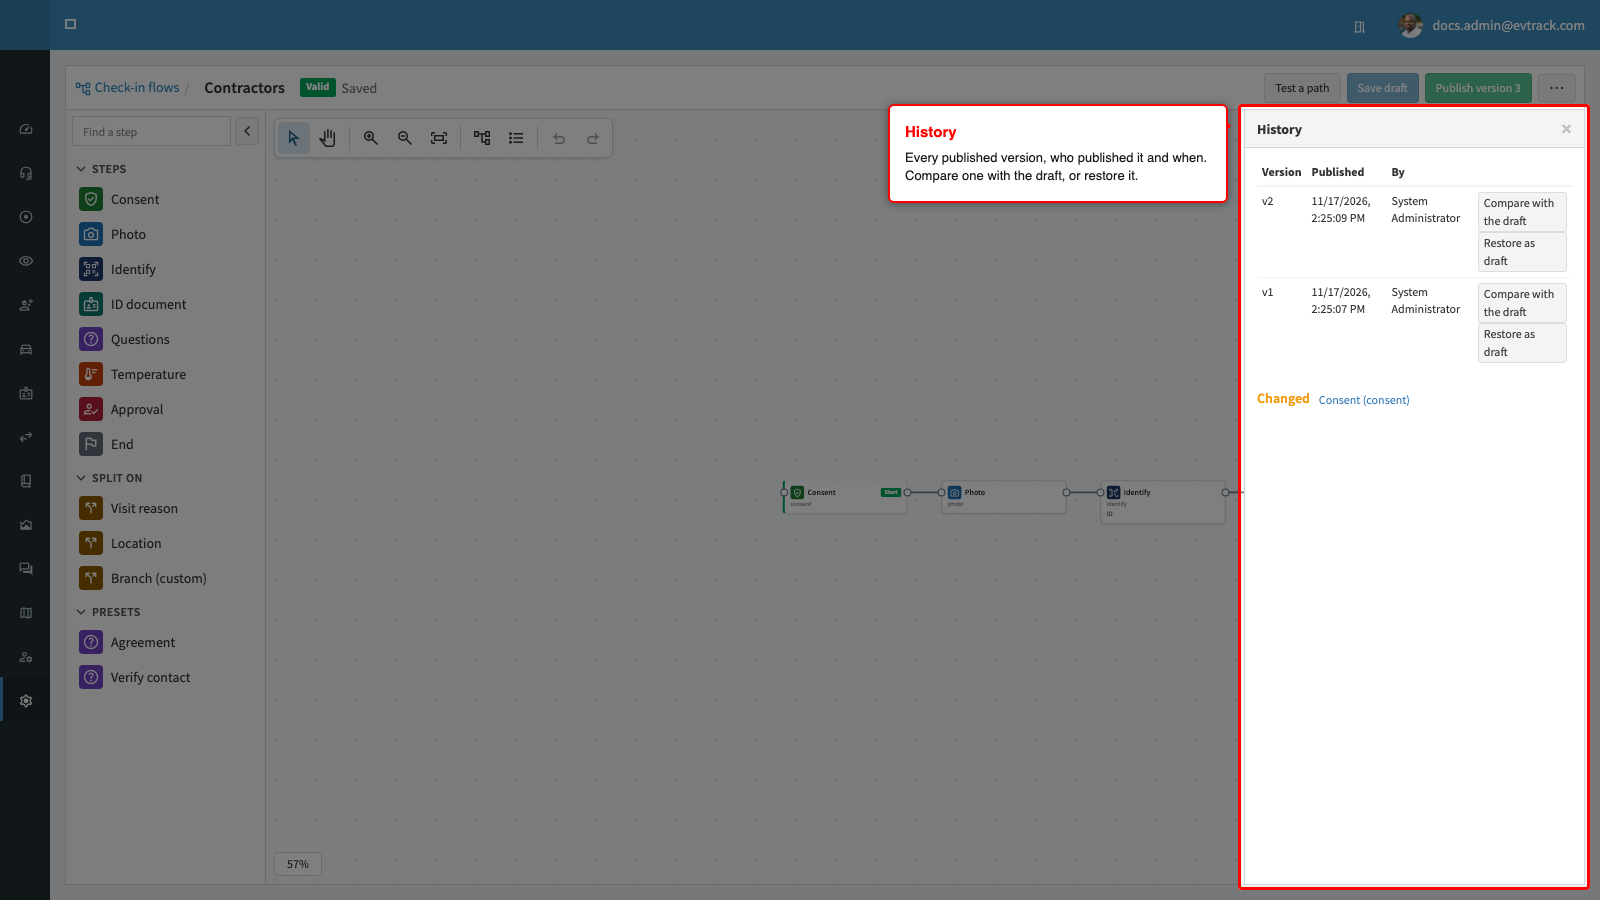
Publishing a new version affects visitors who are part-way through a check-in on the old one: their kiosk asks them to start again.
Test a path
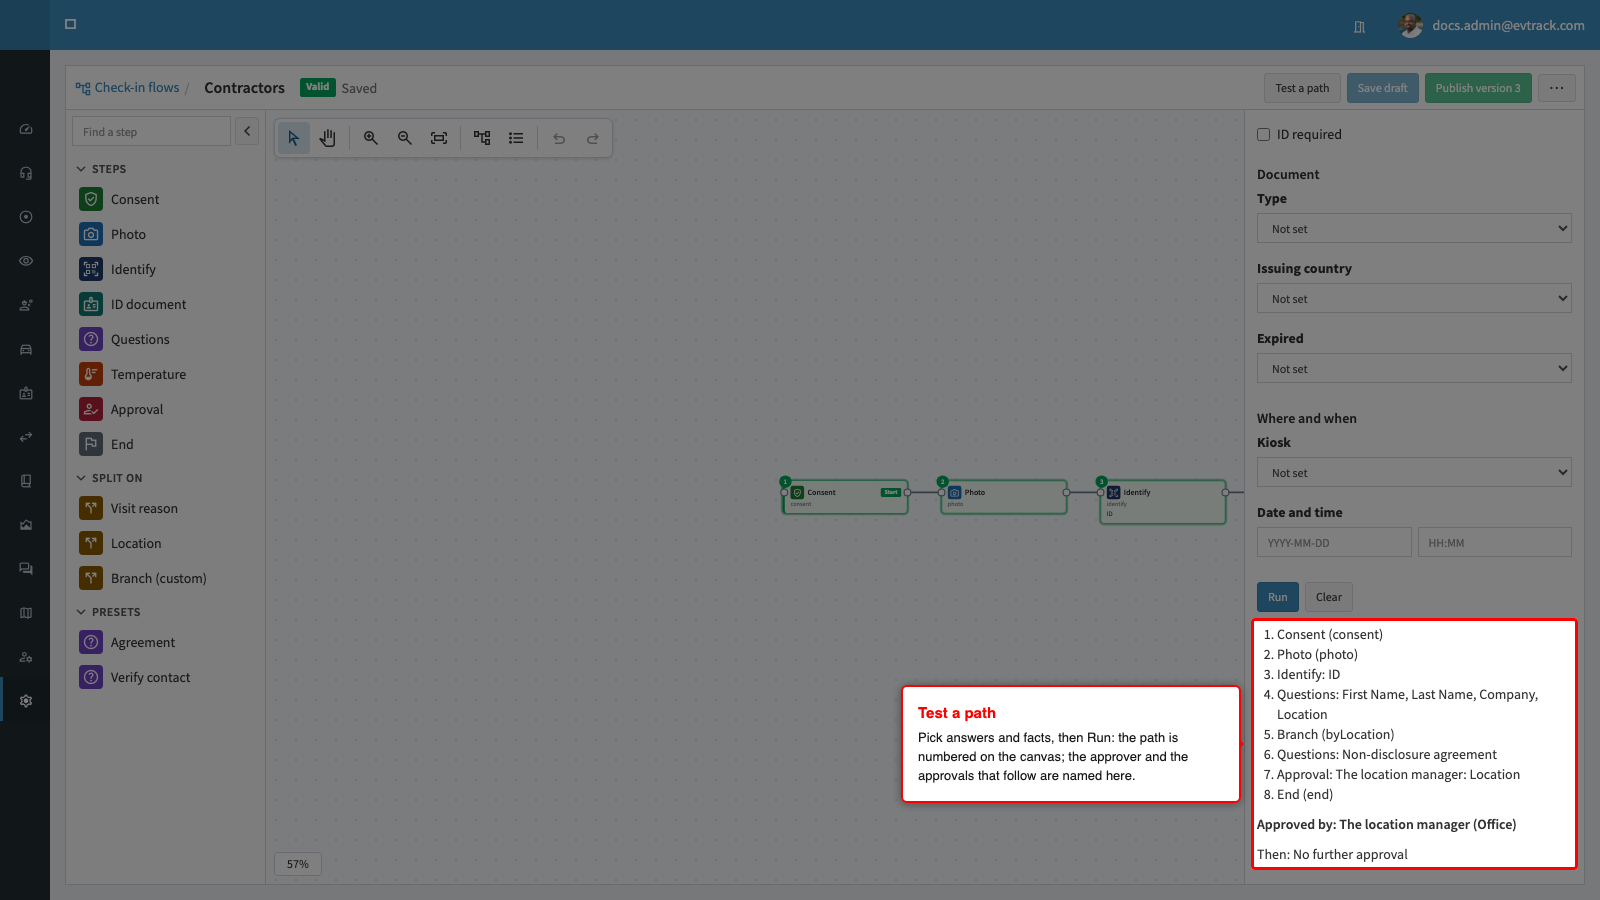
Test a path walks the flow on the canvas, unsaved changes included, without a kiosk. Choose the answers, how the visitor arrived, the document and where and when, then click Run. The steps on the path are numbered on the canvas, and the panel names who approves, for example “Approved by: The location manager (Office)”. Under it, Then lists the approvals that follow at that location, or “No further approval”; when the test names no location and no kiosk, it states the rule instead. Clear removes the marks.
Use a flow
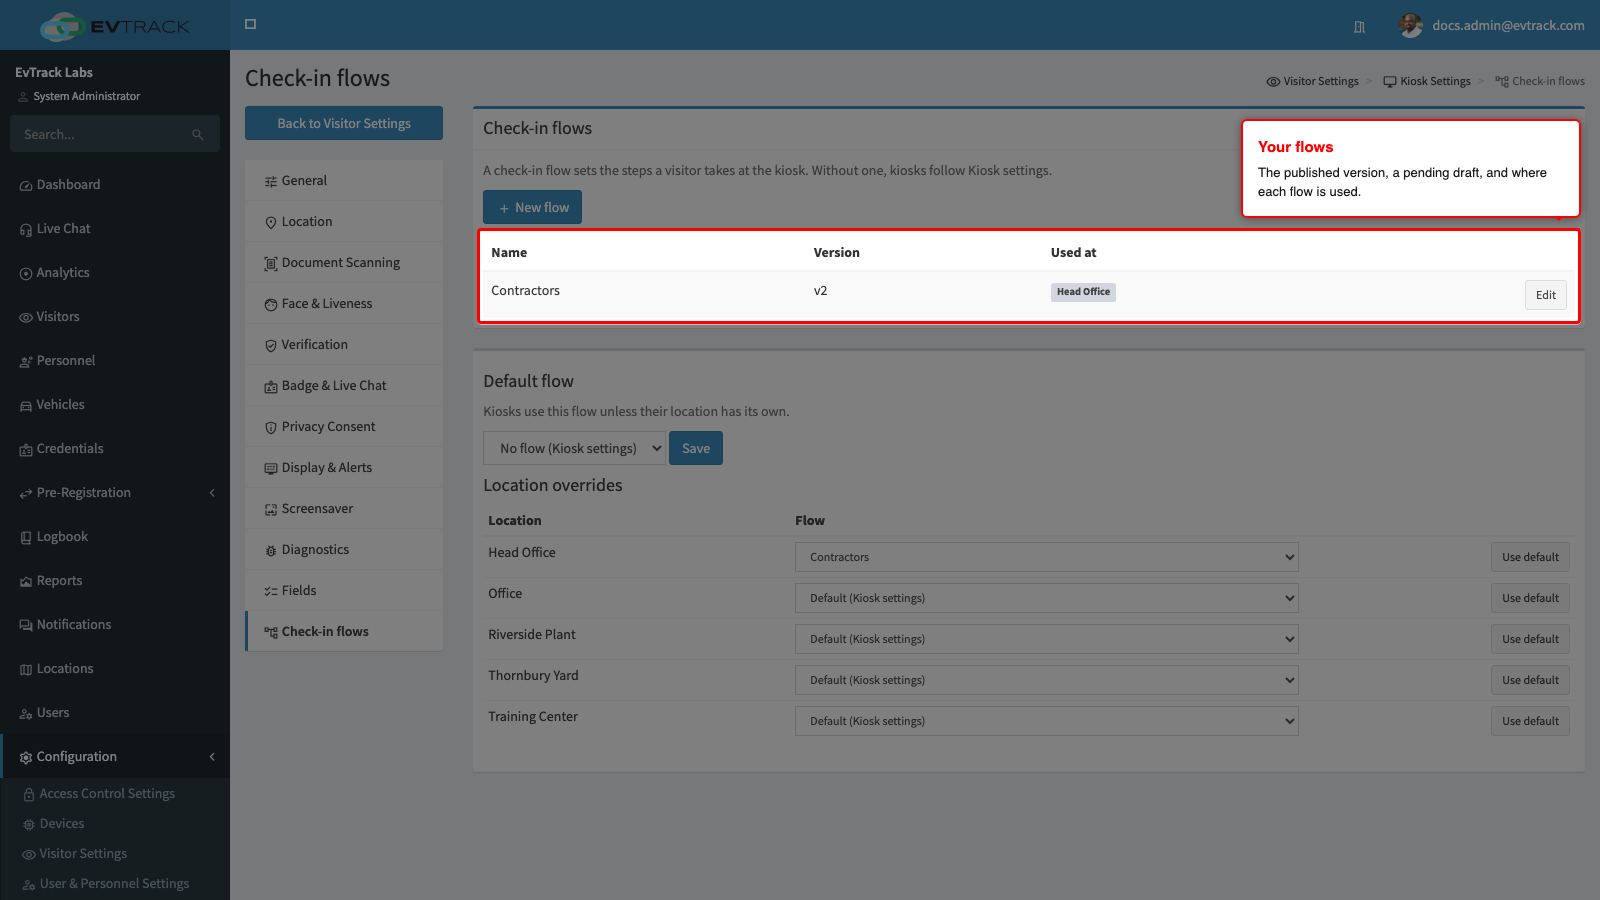
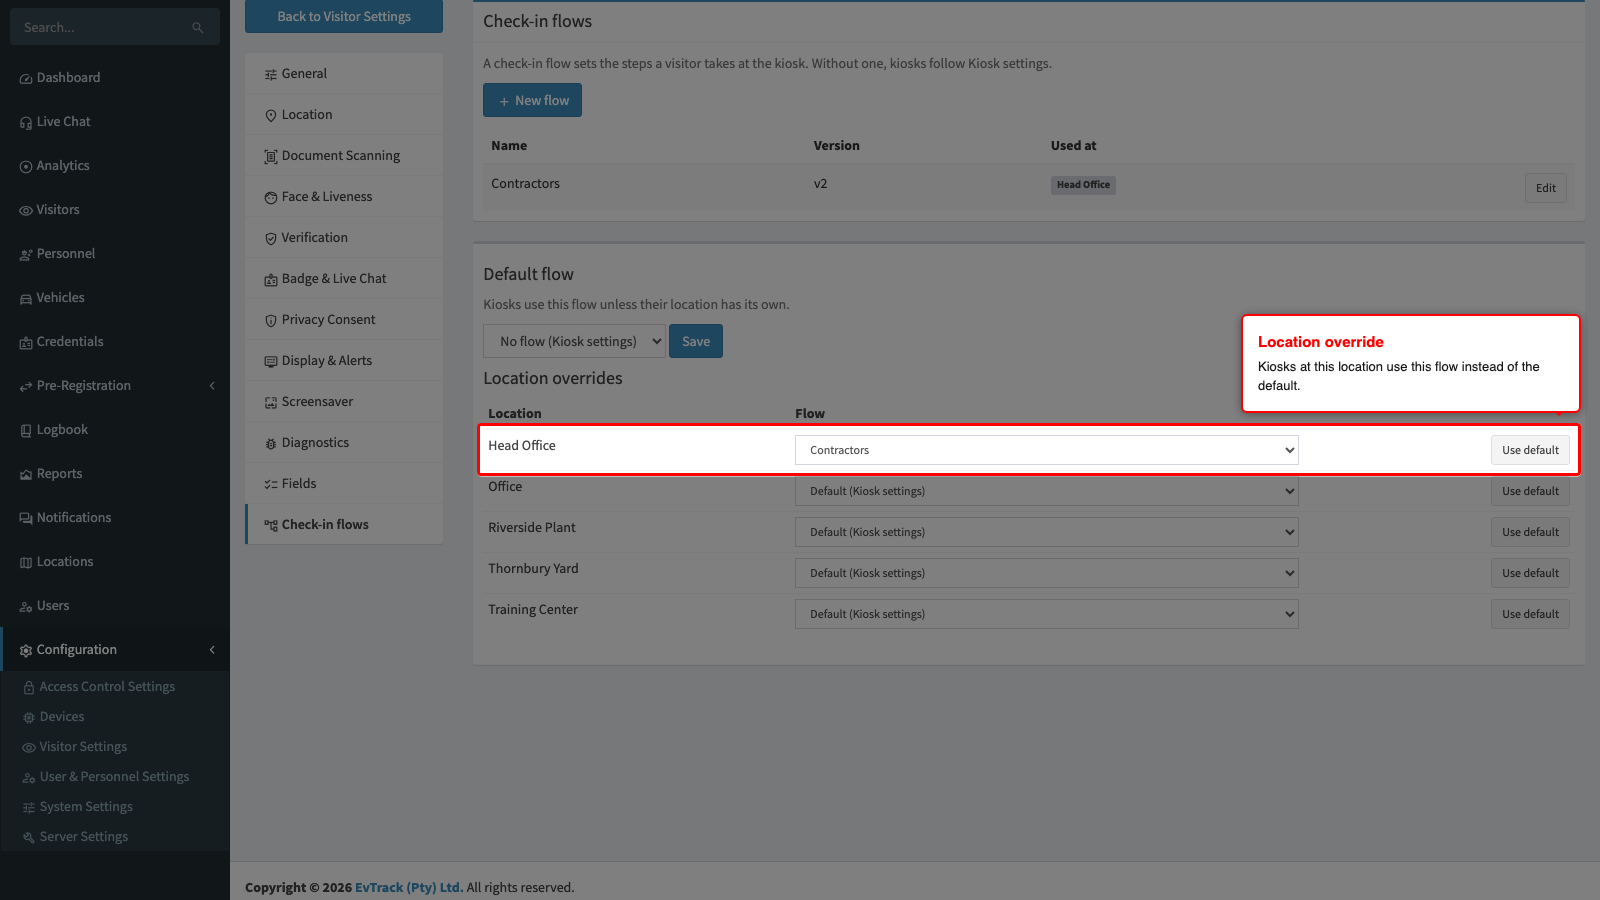
A flow changes kiosks only once it is published and assigned. The list shows each flow’s published version, a pending draft, and where it is used.
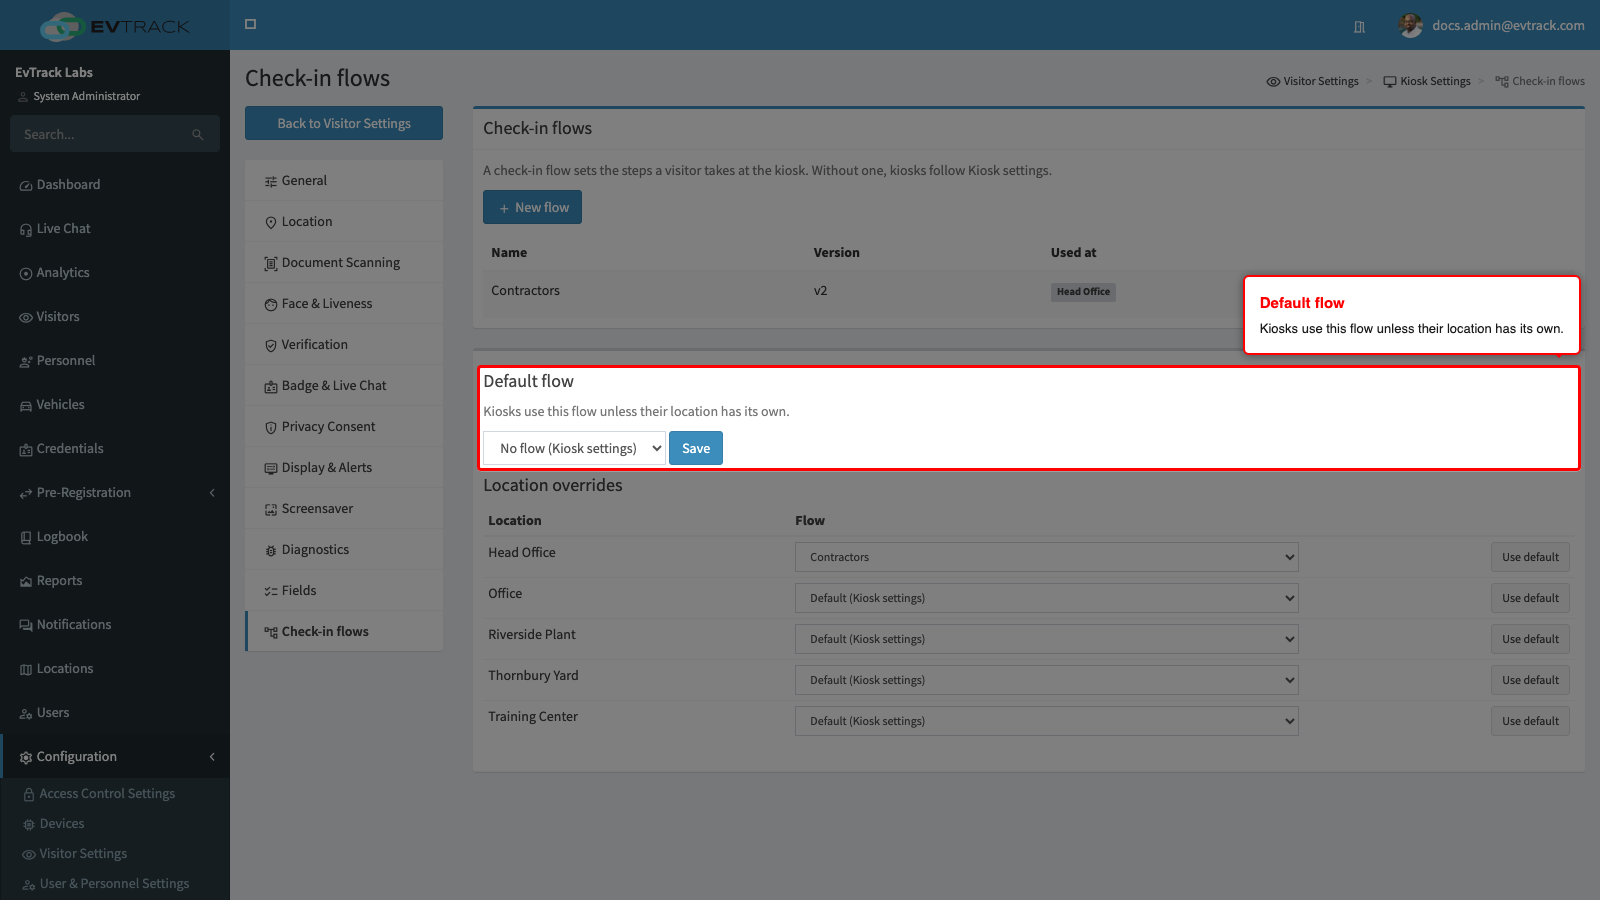
Under Default flow, choose the flow every kiosk uses and click Save. No flow (Kiosk settings) returns the kiosks to the Kiosk settings pages.
Under Location overrides, choose a flow for one location. Kiosks take the flow of the Location on their own device record, else the default. Use default removes the override. Only published flows are offered, and a flow in use cannot be deleted until it is removed from the default and every location.
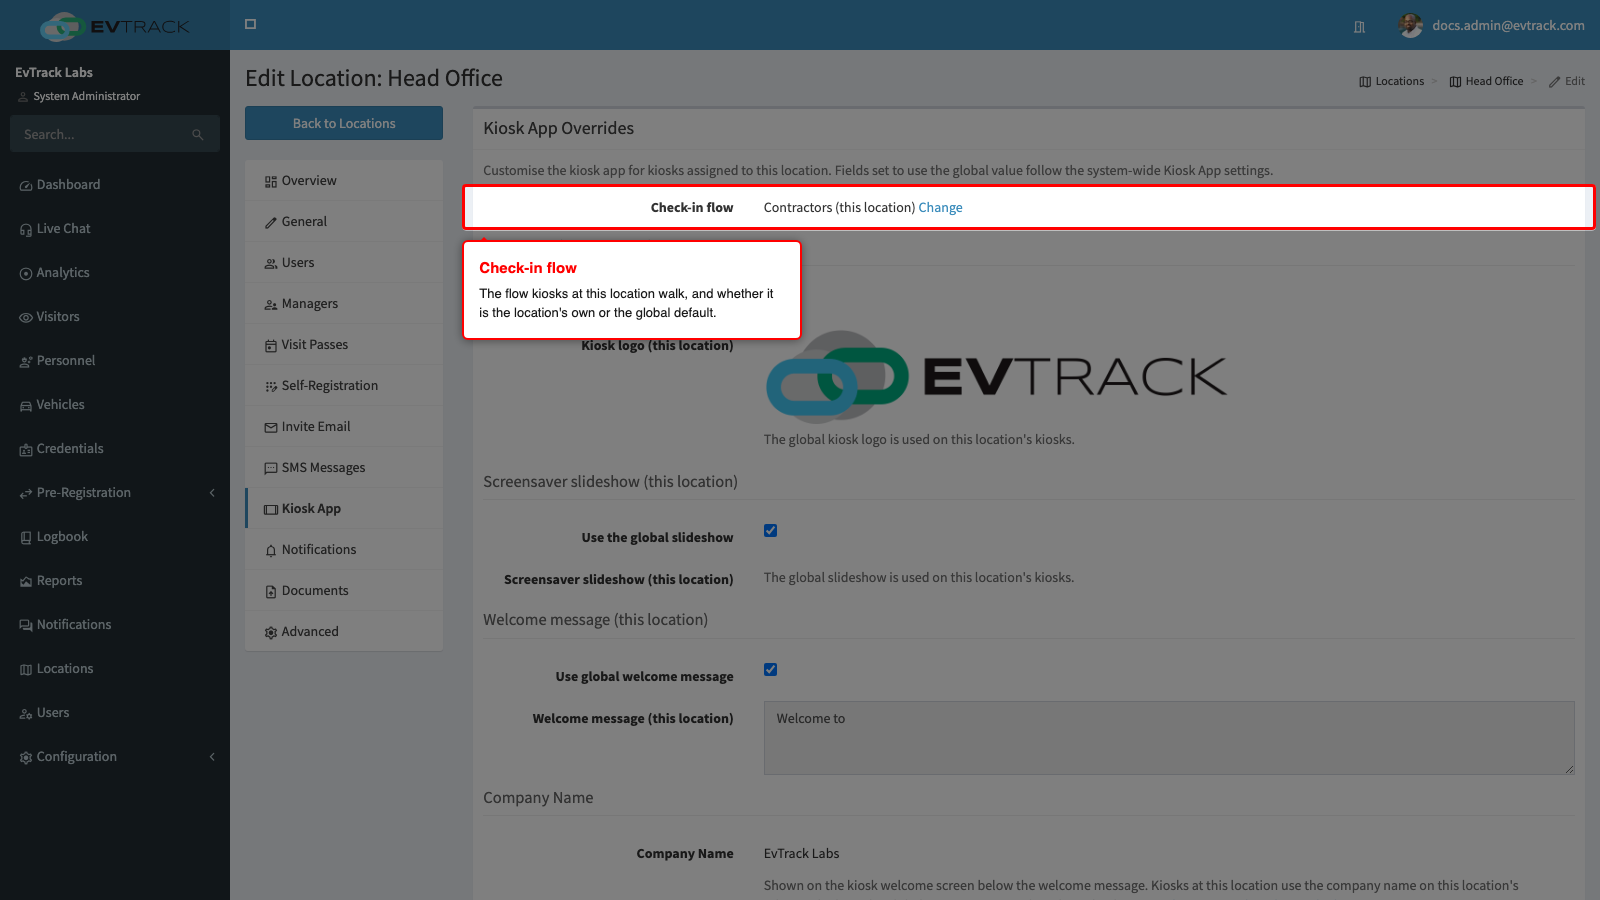
The location’s own page shows which flow its kiosks walk: open Locations, the location, then the Kiosk App tab. Check-in flow reads “Contractors (this location)” for an override, “Name (global)” for the default, or “Kiosk settings (no check-in flow)”. Change opens the flow list at that location’s row.
How kiosks follow a flow
- Kiosks on the current FrontDesk app walk the flow step by step and ask only the questions on the visitor’s path.
- Older kiosks cannot walk a flow. They ask every question any path of the flow can ask, use the flow’s ways to identify visitors, and apply the stricter of the Kiosk settings’ and the flow’s photo and document rules. The server still applies the flow to each check-in: approval, temperature and the questions that count come from the path the visitor’s answers take.
- Answers to questions the visitor’s path does not ask are not kept on the visit.
- A flow that names a field, option or agreement that has since been removed or disabled stops being used: its kiosks follow the Kiosk settings until you fix and publish it.
- A location’s own kiosk field choices (Kiosk App tab) do not apply while a flow is in use: the flow decides the questions.
Limits
- Approvers are the host or a location’s managers. Groups and chains of approvers are not available, and the approval page reads as a host approval.
- Time conditions use the kiosk’s clock and time zone.
- The path a visit took is not shown on the visit.
- The editor cannot branch on the host a visitor picked.
- Copy and paste work within one flow while its page is open: steps cannot be copied to another flow or browser tab.
The kiosk programming interface reference, including check-in flows, is available to partners under NDA.