Every personnel record has a Documents tab where you store the paperwork that lets that person work on site: the safety induction certificate, a contractor’s public liability insurance, a trade licence or competency certificate, a medical or fitness certificate, a signed site rules acknowledgement, or a copy of the identity document used to verify them.
This is the tab that keeps contractor compliance honest. Each stored document carries an effective date and an optional expiry date, so an induction that has to be repeated every year or an insurance policy that runs out at the end of the quarter can be seen at a glance to be current or lapsed, on the person’s own record, before they are issued a card.
Before you start
- Have the file ready as a JPG, PNG, PDF, Word (DOCX) or Excel (XLSX) file. A PDF, DOCX or XLSX file can be up to 10 MB; images are resized on upload. PDF is accepted here because only logged-in staff upload on this tab. On the public registration links a PDF or Word document is sent as pictures of its pages, never as the file itself (see Upload File Formats).
- Viewing, uploading and deleting documents are three separate permissions. If the Documents tab, or the Upload or Delete button, is missing, ask an administrator to extend your role.
- The person must already exist. To create one, see Add Personnel.
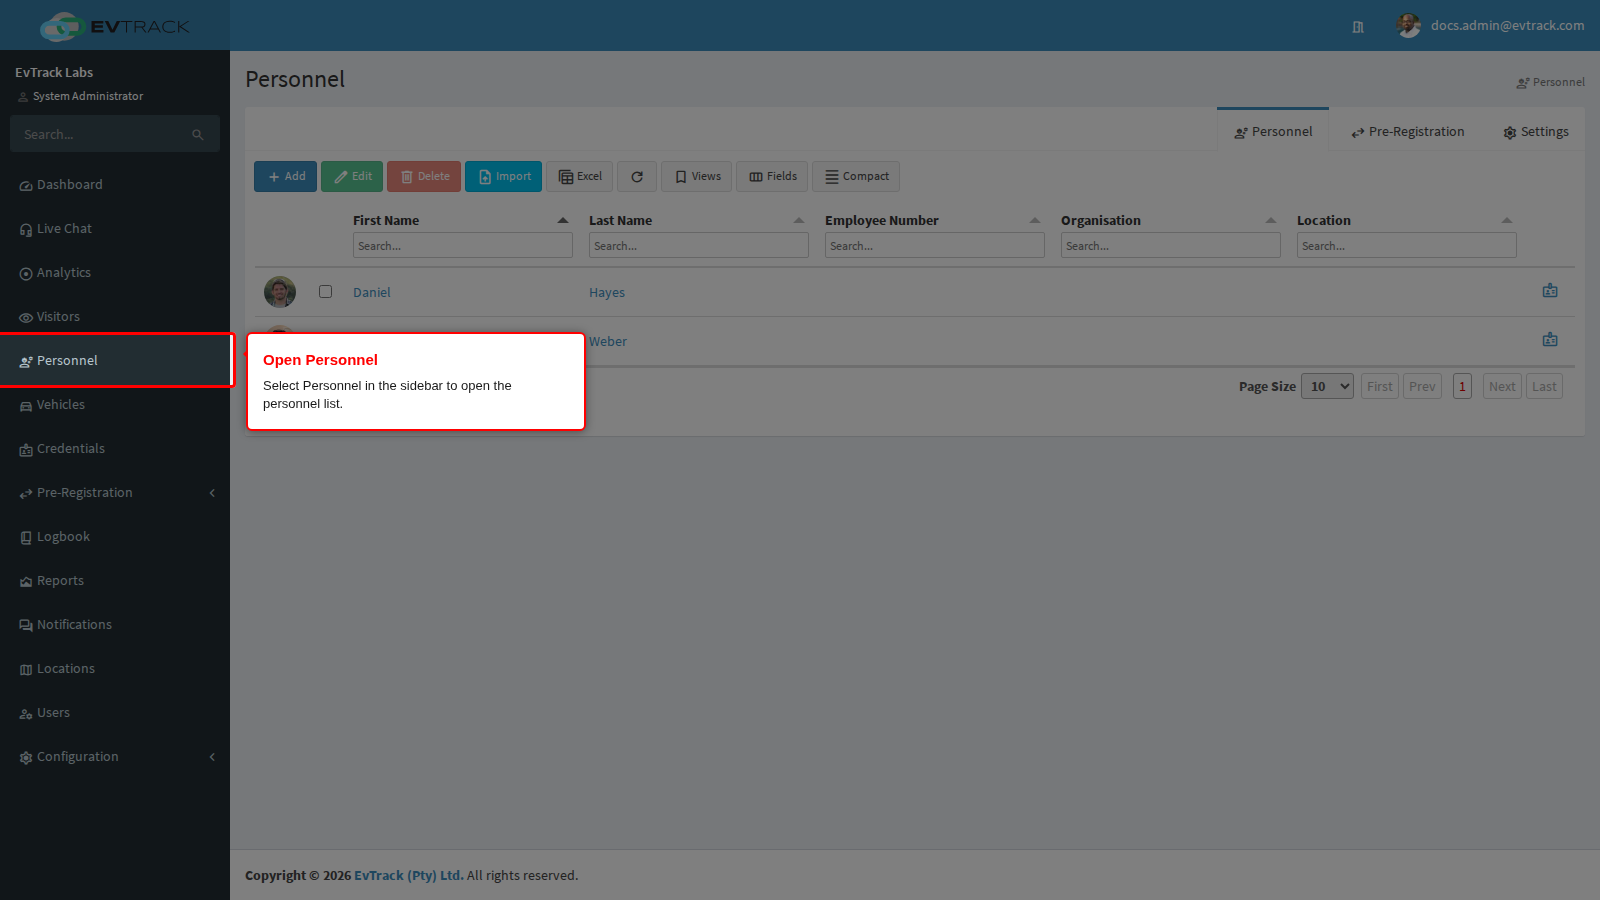
Step 1: Open Personnel
Select Personnel in the sidebar. The personnel list opens, with a search field under each column heading.
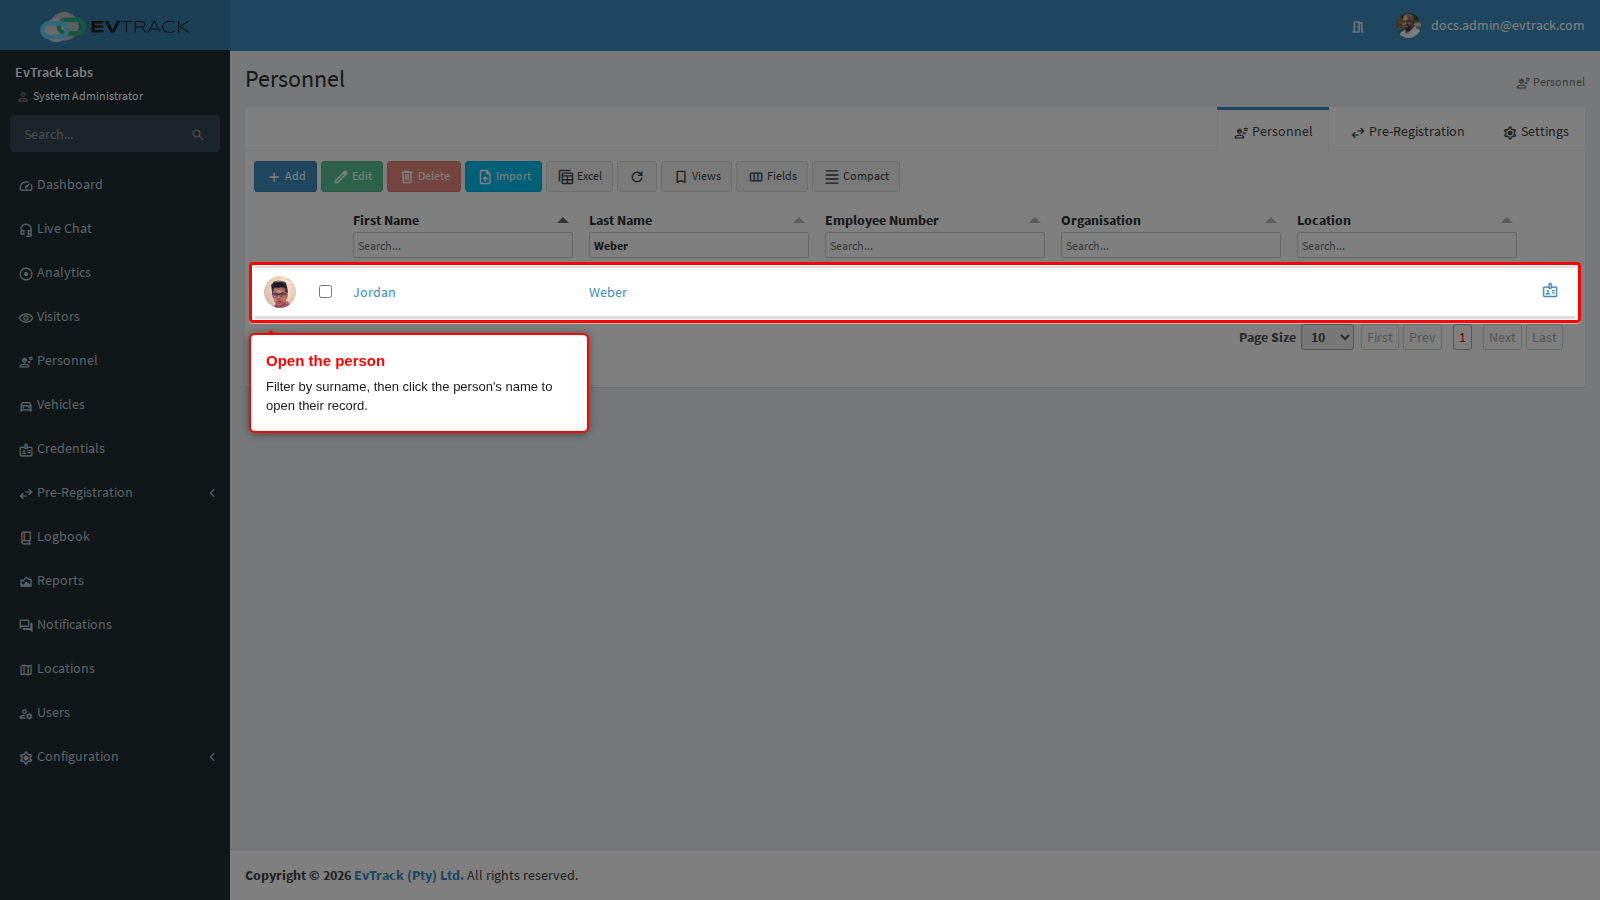
Step 2: Open the person
Type the person’s surname into the search field under the Surname heading; the list narrows as you type. Click the person’s name to open their record.
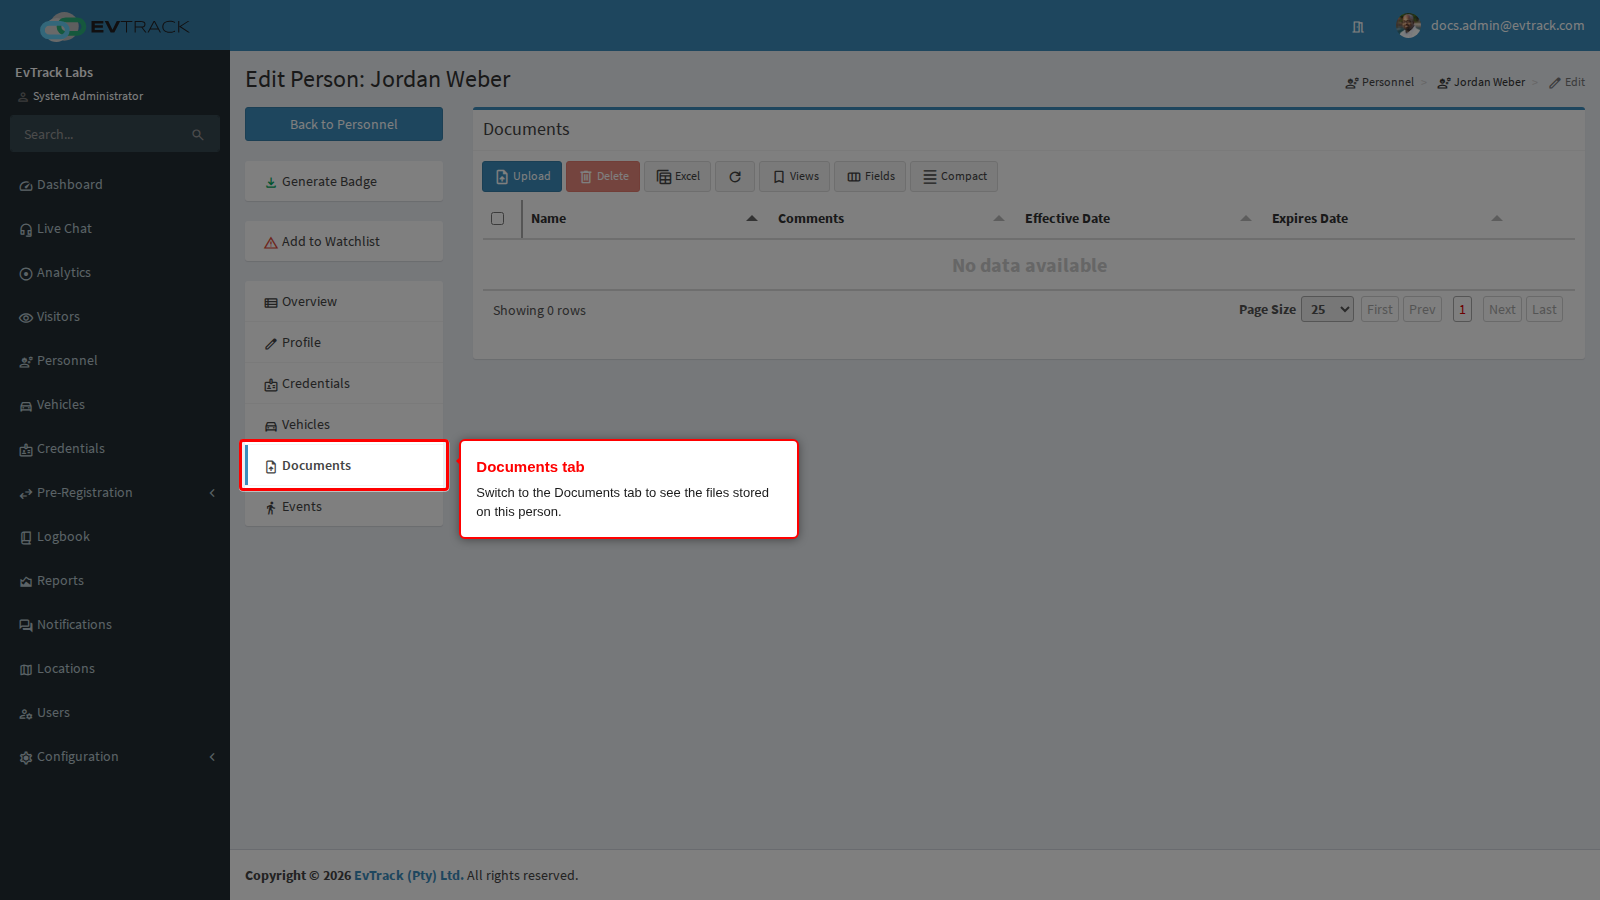
Step 3: Go to the Documents tab
In the tab list on the left of the person’s record, select Documents. The tab shows every document stored on this person, and a toolbar above the list. A person with no documents yet shows an empty list.
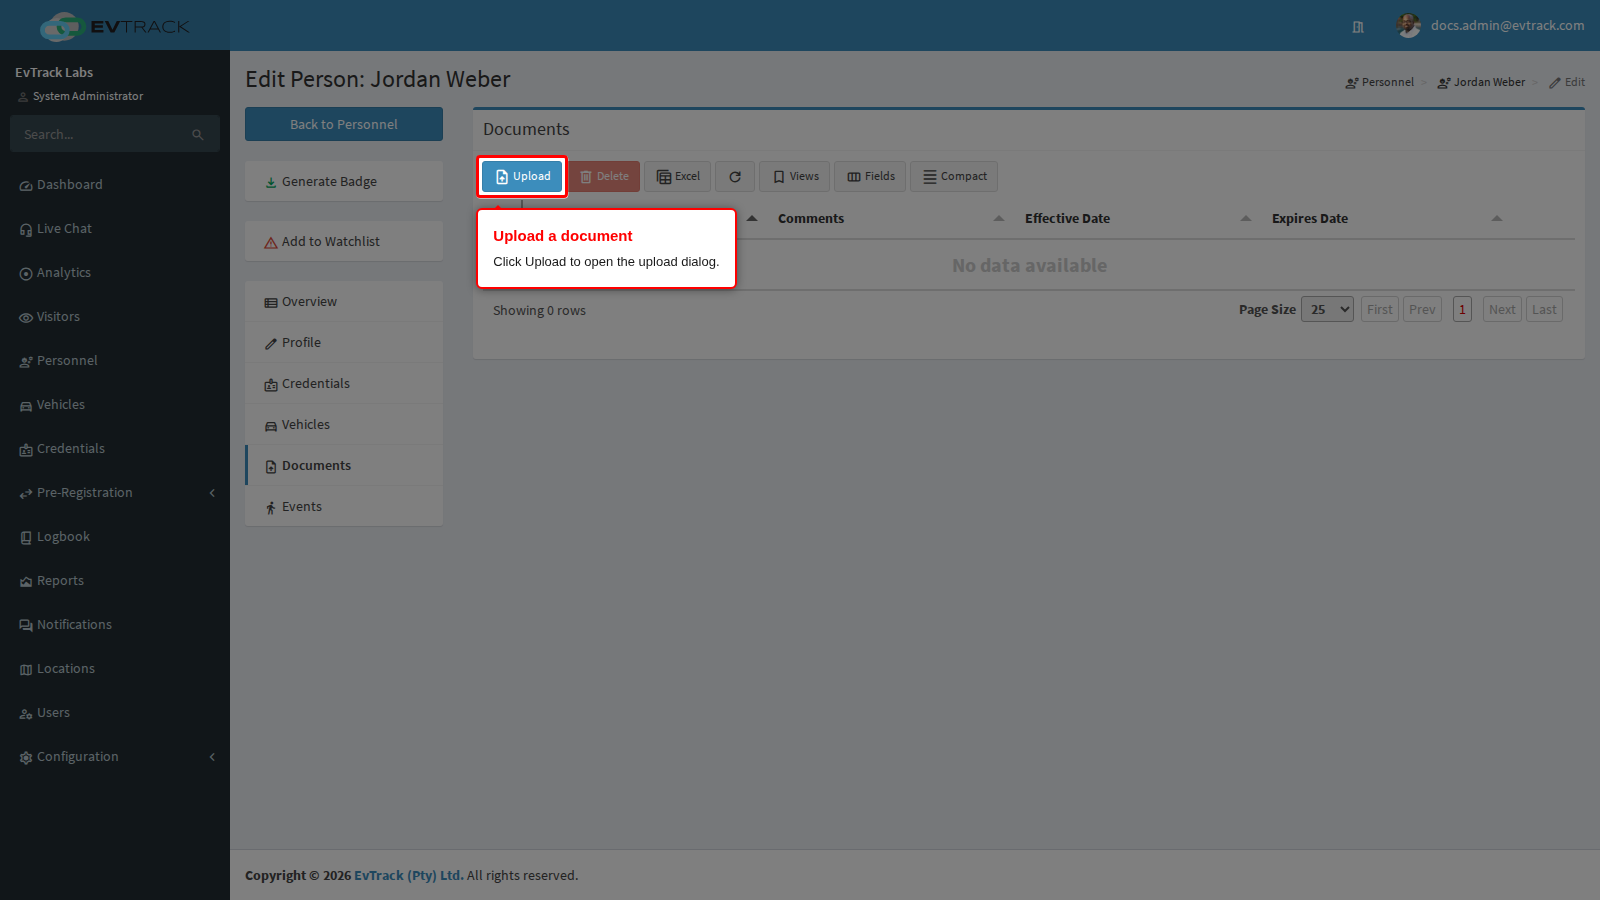
Step 4: Click Upload
Click the blue Upload button in the toolbar. The upload dialog opens.
Step 5: Complete the upload dialog
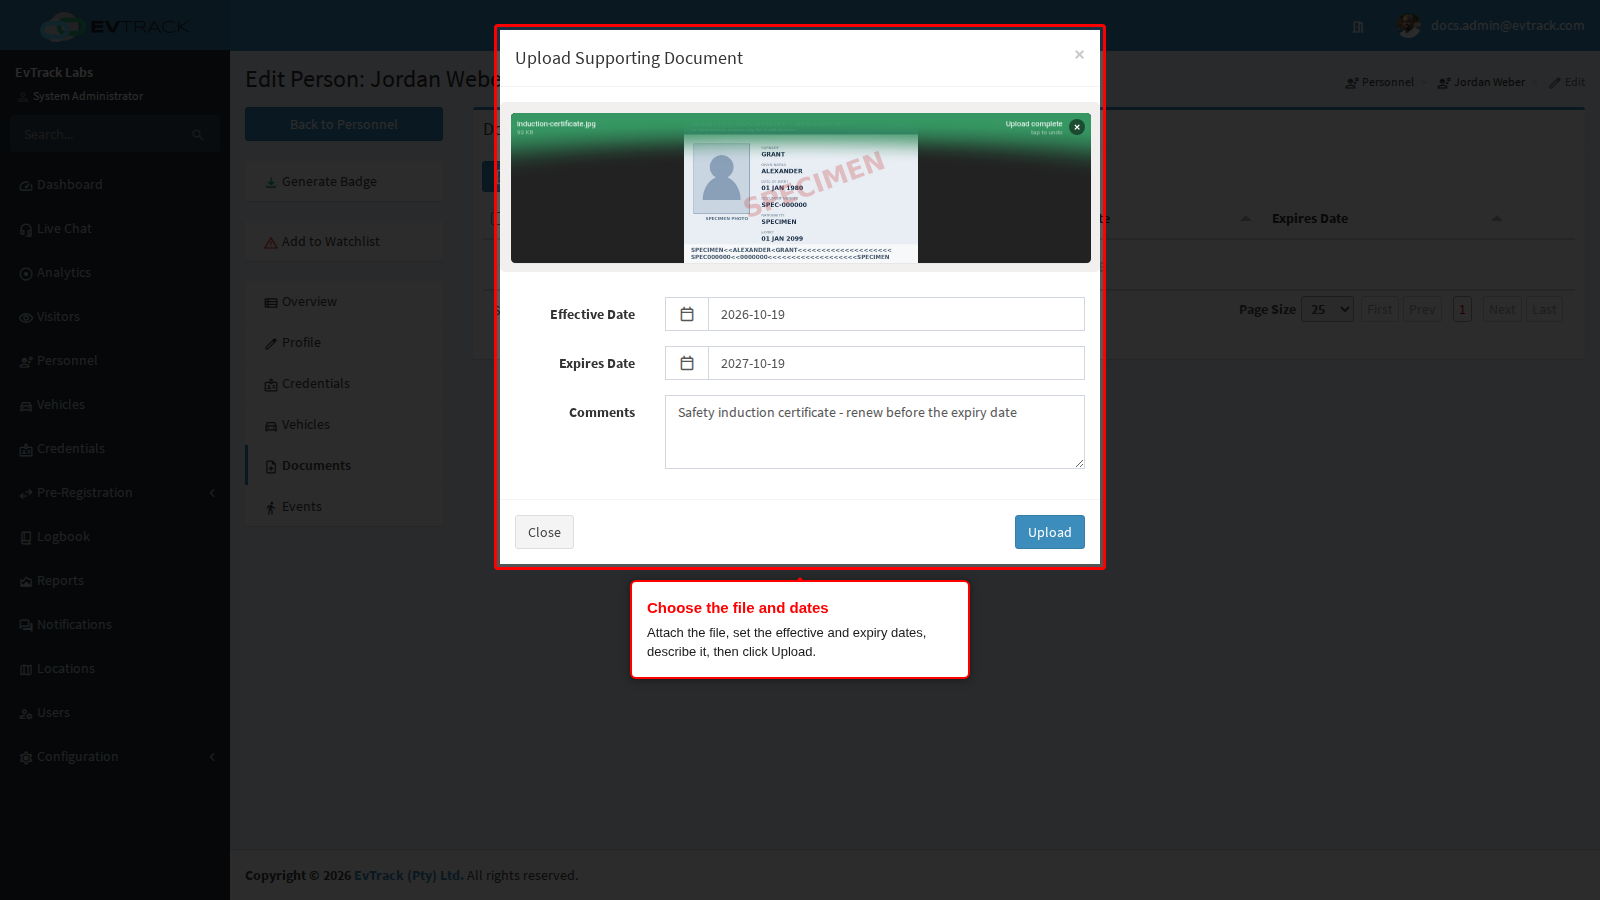
- Drag and drop your file or Browse - drop the file onto the panel, or click Browse and pick it from your computer. Wait for the upload progress to finish; the file is only attached once it completes.
- Effective Date - required, and defaults to today. For a certificate, set it to the date the induction was completed or the policy started rather than the date you happen to scan it.
- Expires Date - optional, and the most useful field on this tab. Set it to the date the induction has to be repeated or the policy runs out, so lapsed compliance paperwork is obvious in the list.
- Comments - a short description of what the document is. This is what a supervisor reads next to the file name, so describe the document rather than the file.
Click Upload. The dialog closes and the list refreshes.
Step 6: The document is stored
The document now appears on the person with its comments, effective date and expiry date.
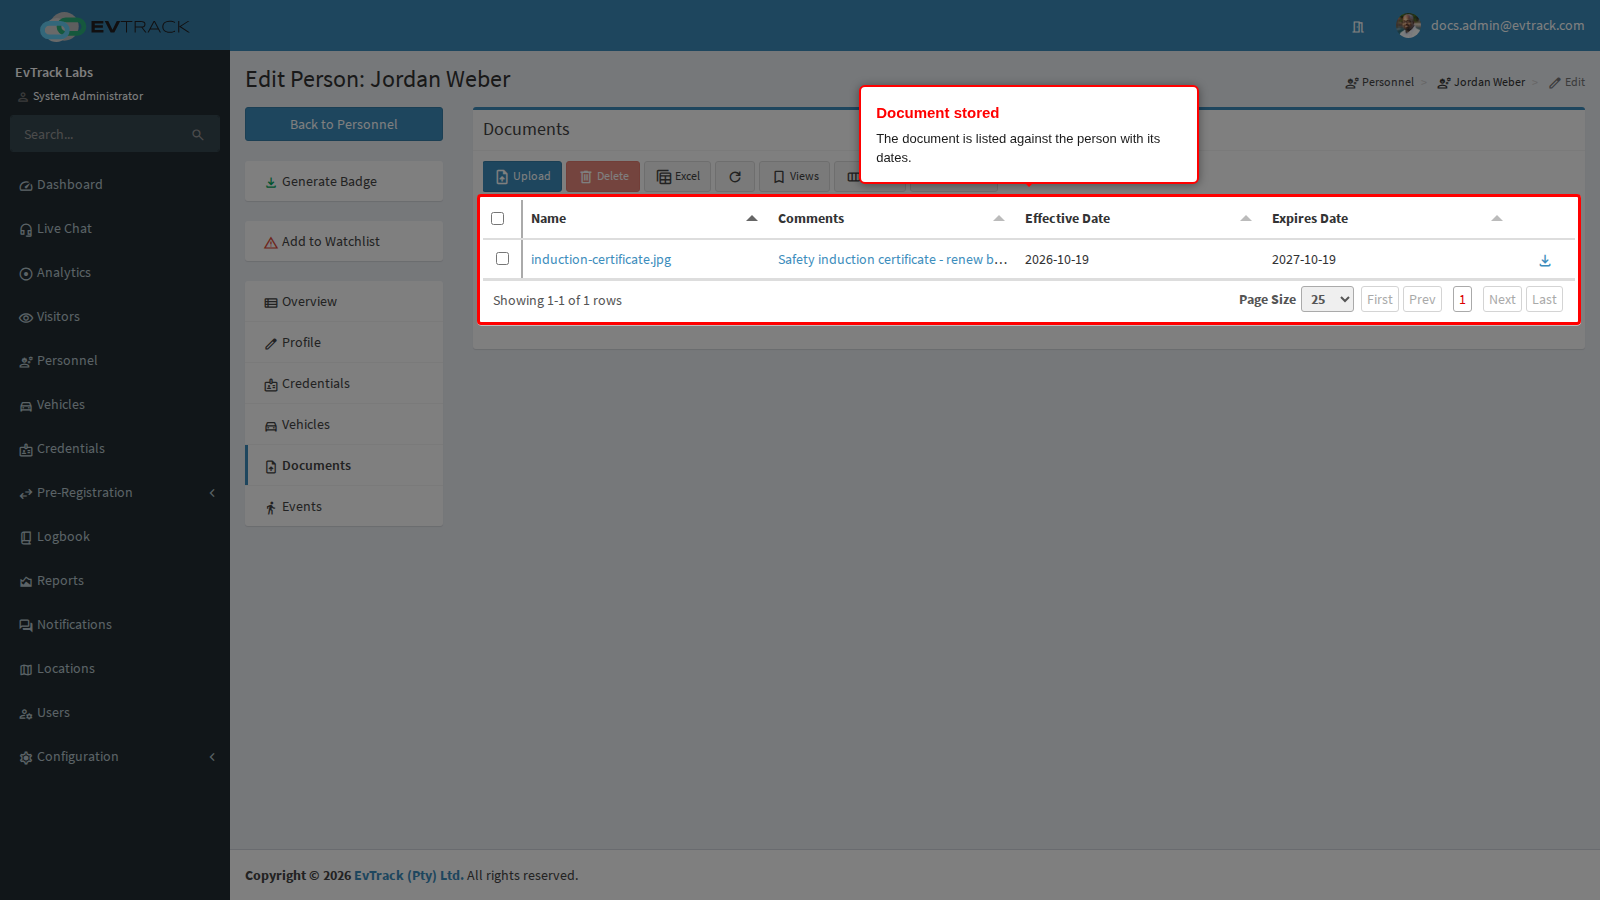
Click the file name, or the eye icon at the end of the row, to open the document in the document viewer. Pictures, PDF files and Word (DOCX) documents open there: the pages are listed down the left, and the page you pick is shown large on the right, where you can zoom and drag it. The viewer loads each page only when you look at it. A Word document is drawn by your browser, so the viewer shows “Preview only - the layout may differ from Word. Download gives the original .docx.” Users who can download documents also see Download and Print all for a PDF or Word file, and Download and Print for a picture. Other files, such as Excel workbooks, download when you click them.
A document that arrived as pages, for example a document uploaded on a registration link, is one row: the Pages column shows how many pages it has, and the viewer offers Download PDF (every page in one PDF file), Download page and Print all. Deleting that row deletes every page of the document.
Each Download, Download PDF, Download page, Print and Print all is recorded on the person’s Events tab, with the document name and who did it, and in the audit log.
Sort on the Expires Date column to bring the paperwork that needs renewing to the top.
Step 7: Select the document you want to remove
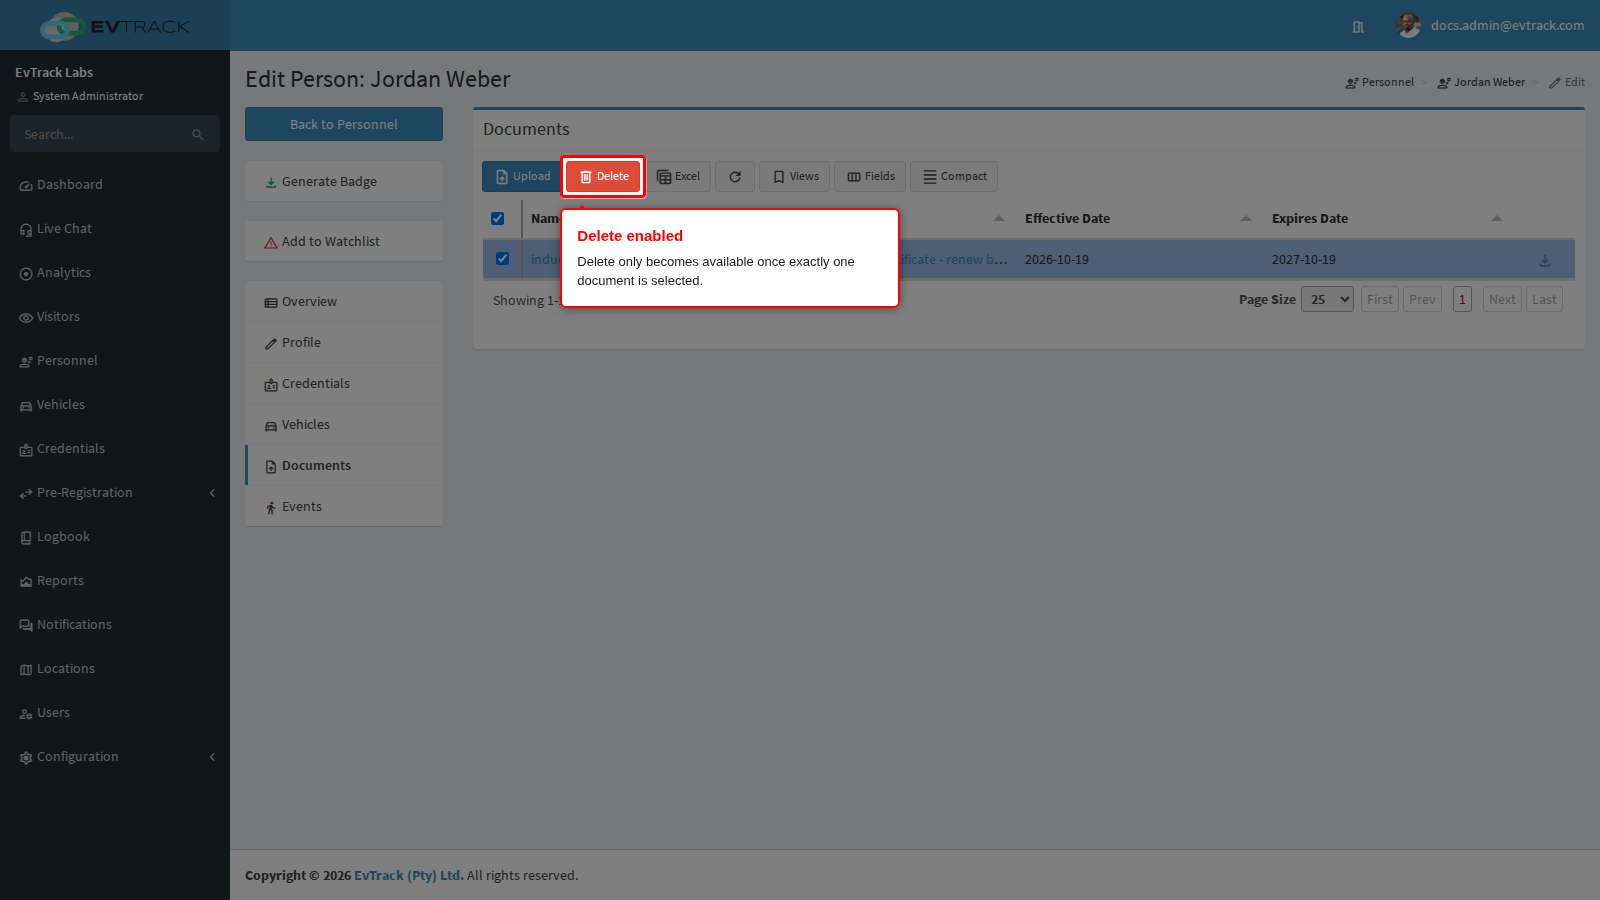
Tick the selection box at the start of the document’s row. The red Delete button remains disabled until exactly one document is selected.
Step 8: Confirm the deletion
Click Delete. A confirmation window asks you to confirm.
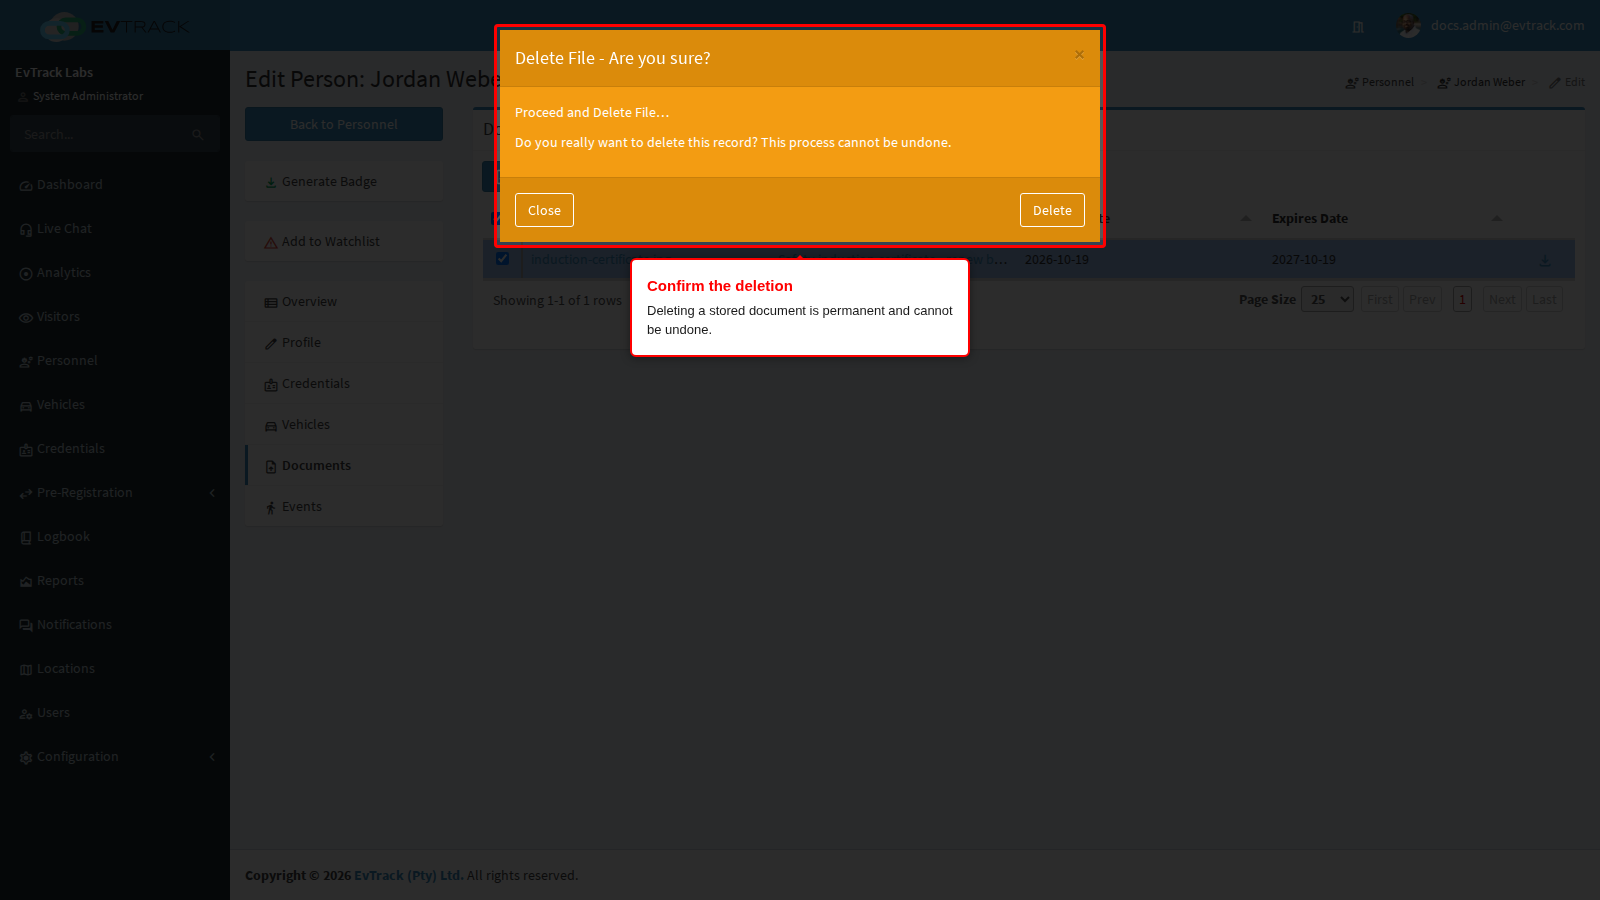
Deleting a document is permanent and cannot be undone. Download a copy first if you may need the file again. Click Delete in the confirmation window to proceed, or Close to keep the document.
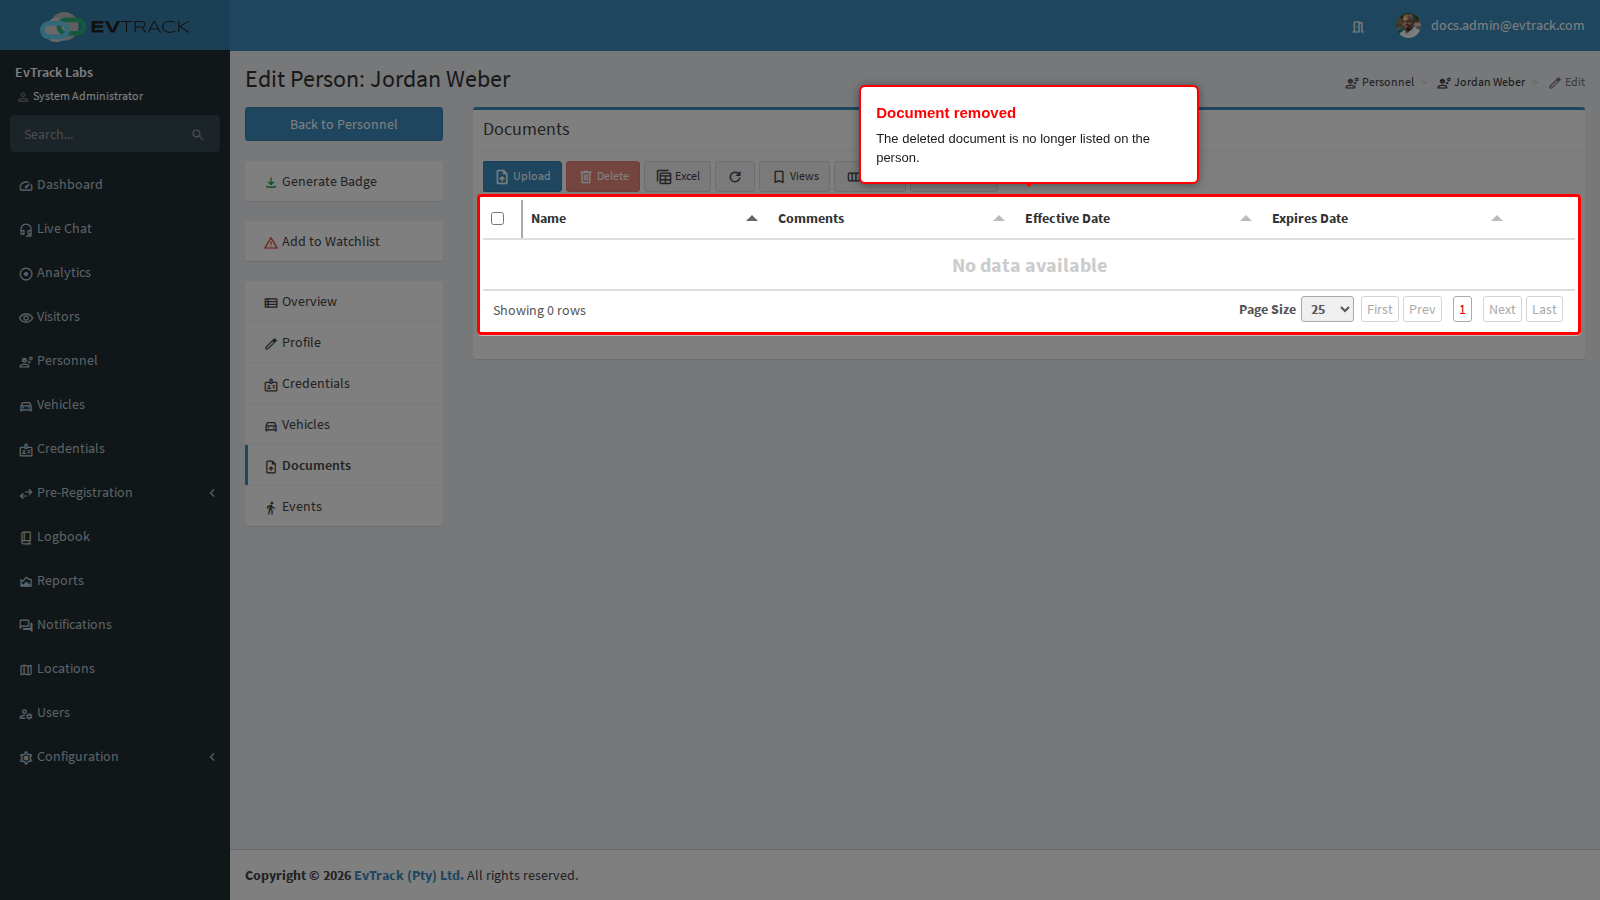
Step 9: The document is removed
The list refreshes and the document is no longer stored on the person.
Notes
- Keep the superseded version until the replacement is uploaded: upload the new certificate first, check that it is listed, then delete the old one.
- Storing an expiry date here records when the paperwork lapses. It does not by itself stop the person entering. To stop access when someone is no longer cleared, set their account or credential validity - see Validity and Credential Expiry.
- A person’s badge photo, uploaded on the Profile tab, is separate from this tab. Use Documents for supporting paperwork that has its own validity dates.
See also
- Documents on Records - the shared Documents panel, plus location and vehicle documents
- Documents on a User and Documents on a Visitor
- Site Documents - files that belong to the whole site rather than to one record